Hosting with GitHub Pages & connecting it to your custom domain name
Setting up your own hosting with GitHub Pages
To set up hosting using GitHub Pages, we will...
Steps:
- Create a GitHub repository
- Push a test to this repository to see it's working
- Enable GitHub Pages on the repository
- Test that the hosting works on the temporary URL given
But first, you might be wondering...
What is GitHub?!
GitHub is a platform that lets you host your code. This makes it easy for collaborating with others on the same code and also version control.
_ Note that GitHub is a centralized platform owned by Microsoft. The technology it uses, git, is decentralized._
Here is GitHub's getting started guide for reference.
I first used GitHub when I was working in a professional coding setting with others (this was the design studio Linked by Air for me). There, I needed to collaborate with my co-workers on the same code base. It felt really pro to use GitHub, but also it took me a long time to fully understand. A lot of the confusing aspects of git and GitHub are put into place so that code isn't accidentally deleted. — Laurel
When we use GitHub for its hosting product GitHub Pages, we aren't using a lot of its powerful functionality including collaborative and version control features. So it might seem confusing at first...
Here is some GitHub-specific vocabulary that might be useful...
| jargon | how I think of it |
|---|---|
| repository | a vessel / container for a single project on GitHub |
| push | upload / update changes to the repository |
| pull | download / update changes from the repository |
| commit | the preliminary step before you push, this is a way of saving your changes / updates to the repository. every commit needs a "commit message" that describes what you are updating |
Before we begin...
If you don't already have an account on GitHub, create one.
Download the desktop application Github Desktop.
1. Create a GitHub repository
Open up GitHub Desktop program on your computer.
From here, sign into your GitHub account by going to GitHub Desktop / Preferences in the upper bar navigation.
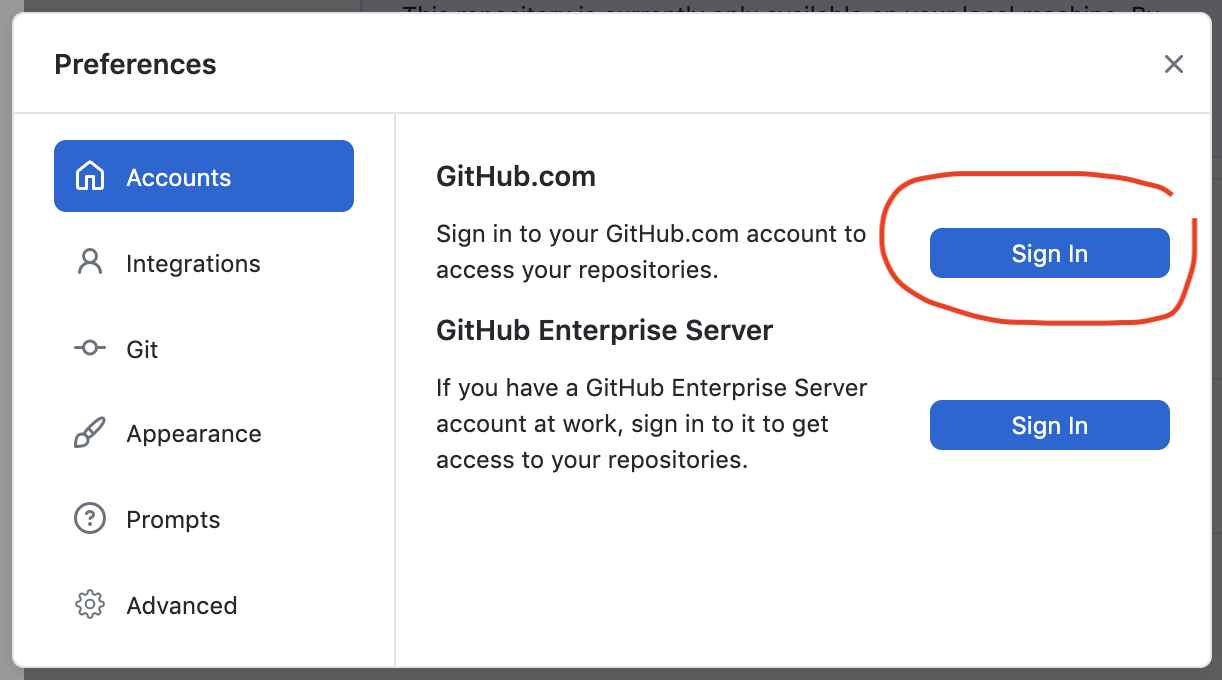
From here, find a menu or link that allows you to "Create a new repository". It might be hiding in the left menu.

In the popup that follows, insert a name for your repository. I would recommend using the domain name that you registered, but it could be something else too.
You will also want to specify where your repository lives. I chose my "Sites" folder, which is where all my sites live on my computer. (Personally, mine are in my Dropbox, but up to you where this is.)
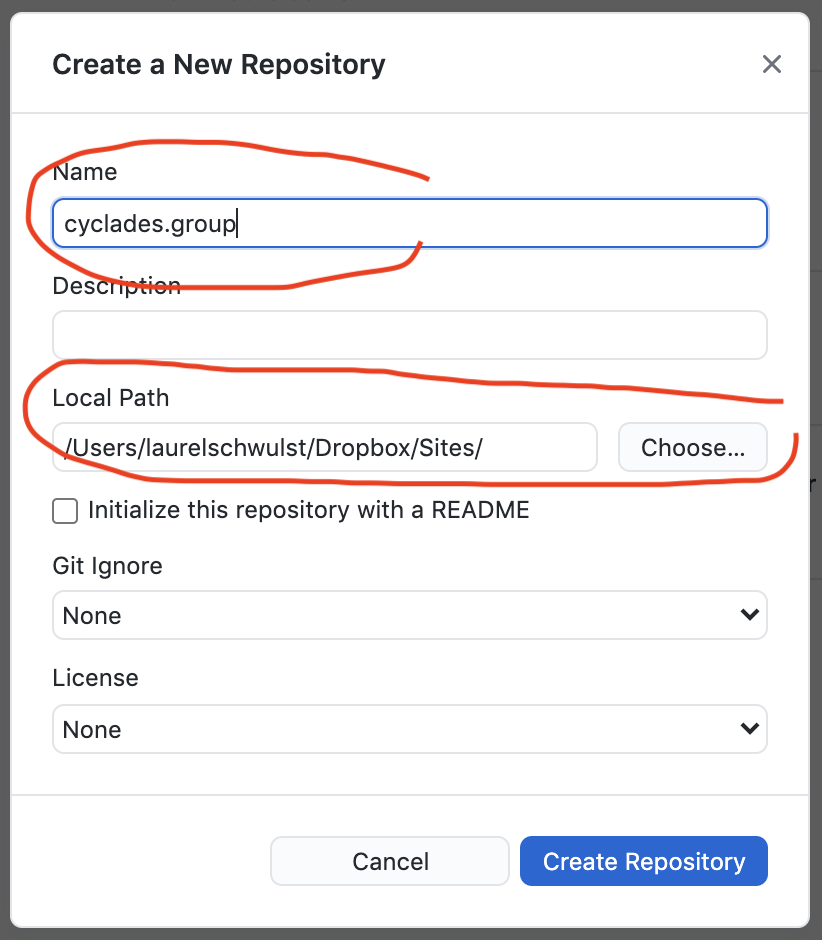
Once you do this, you will see that GitHub Desktop has created a new folder inside your "Sites" folder (or wherever you specified your repository to be saved) titled whatever you called your repository.

2. Push a test to this repository to see that it's working
Now, try creating a new file in your text editor called index.html, as a test...
<!DOCTYPE html>
<html>
  <head>
	<title>Testing 123</title>
	<meta name="viewport" content="width=device-width,initial-scale=1.0">
	<meta charset="utf-8">
  </head>
  <body>
	Hello worlds
  </body>
</html>
Then save this index.html inside of your repository's folder.

When you return to your GitHub Desktop app, you should notice a change. It sees that you added a file. That's why you see some text highlighted in green on the right.

Next, you'll want to:
-
Write a "commit" message (describing what you changed / updated)
-
Press the "Commit to main" blue button

After that...
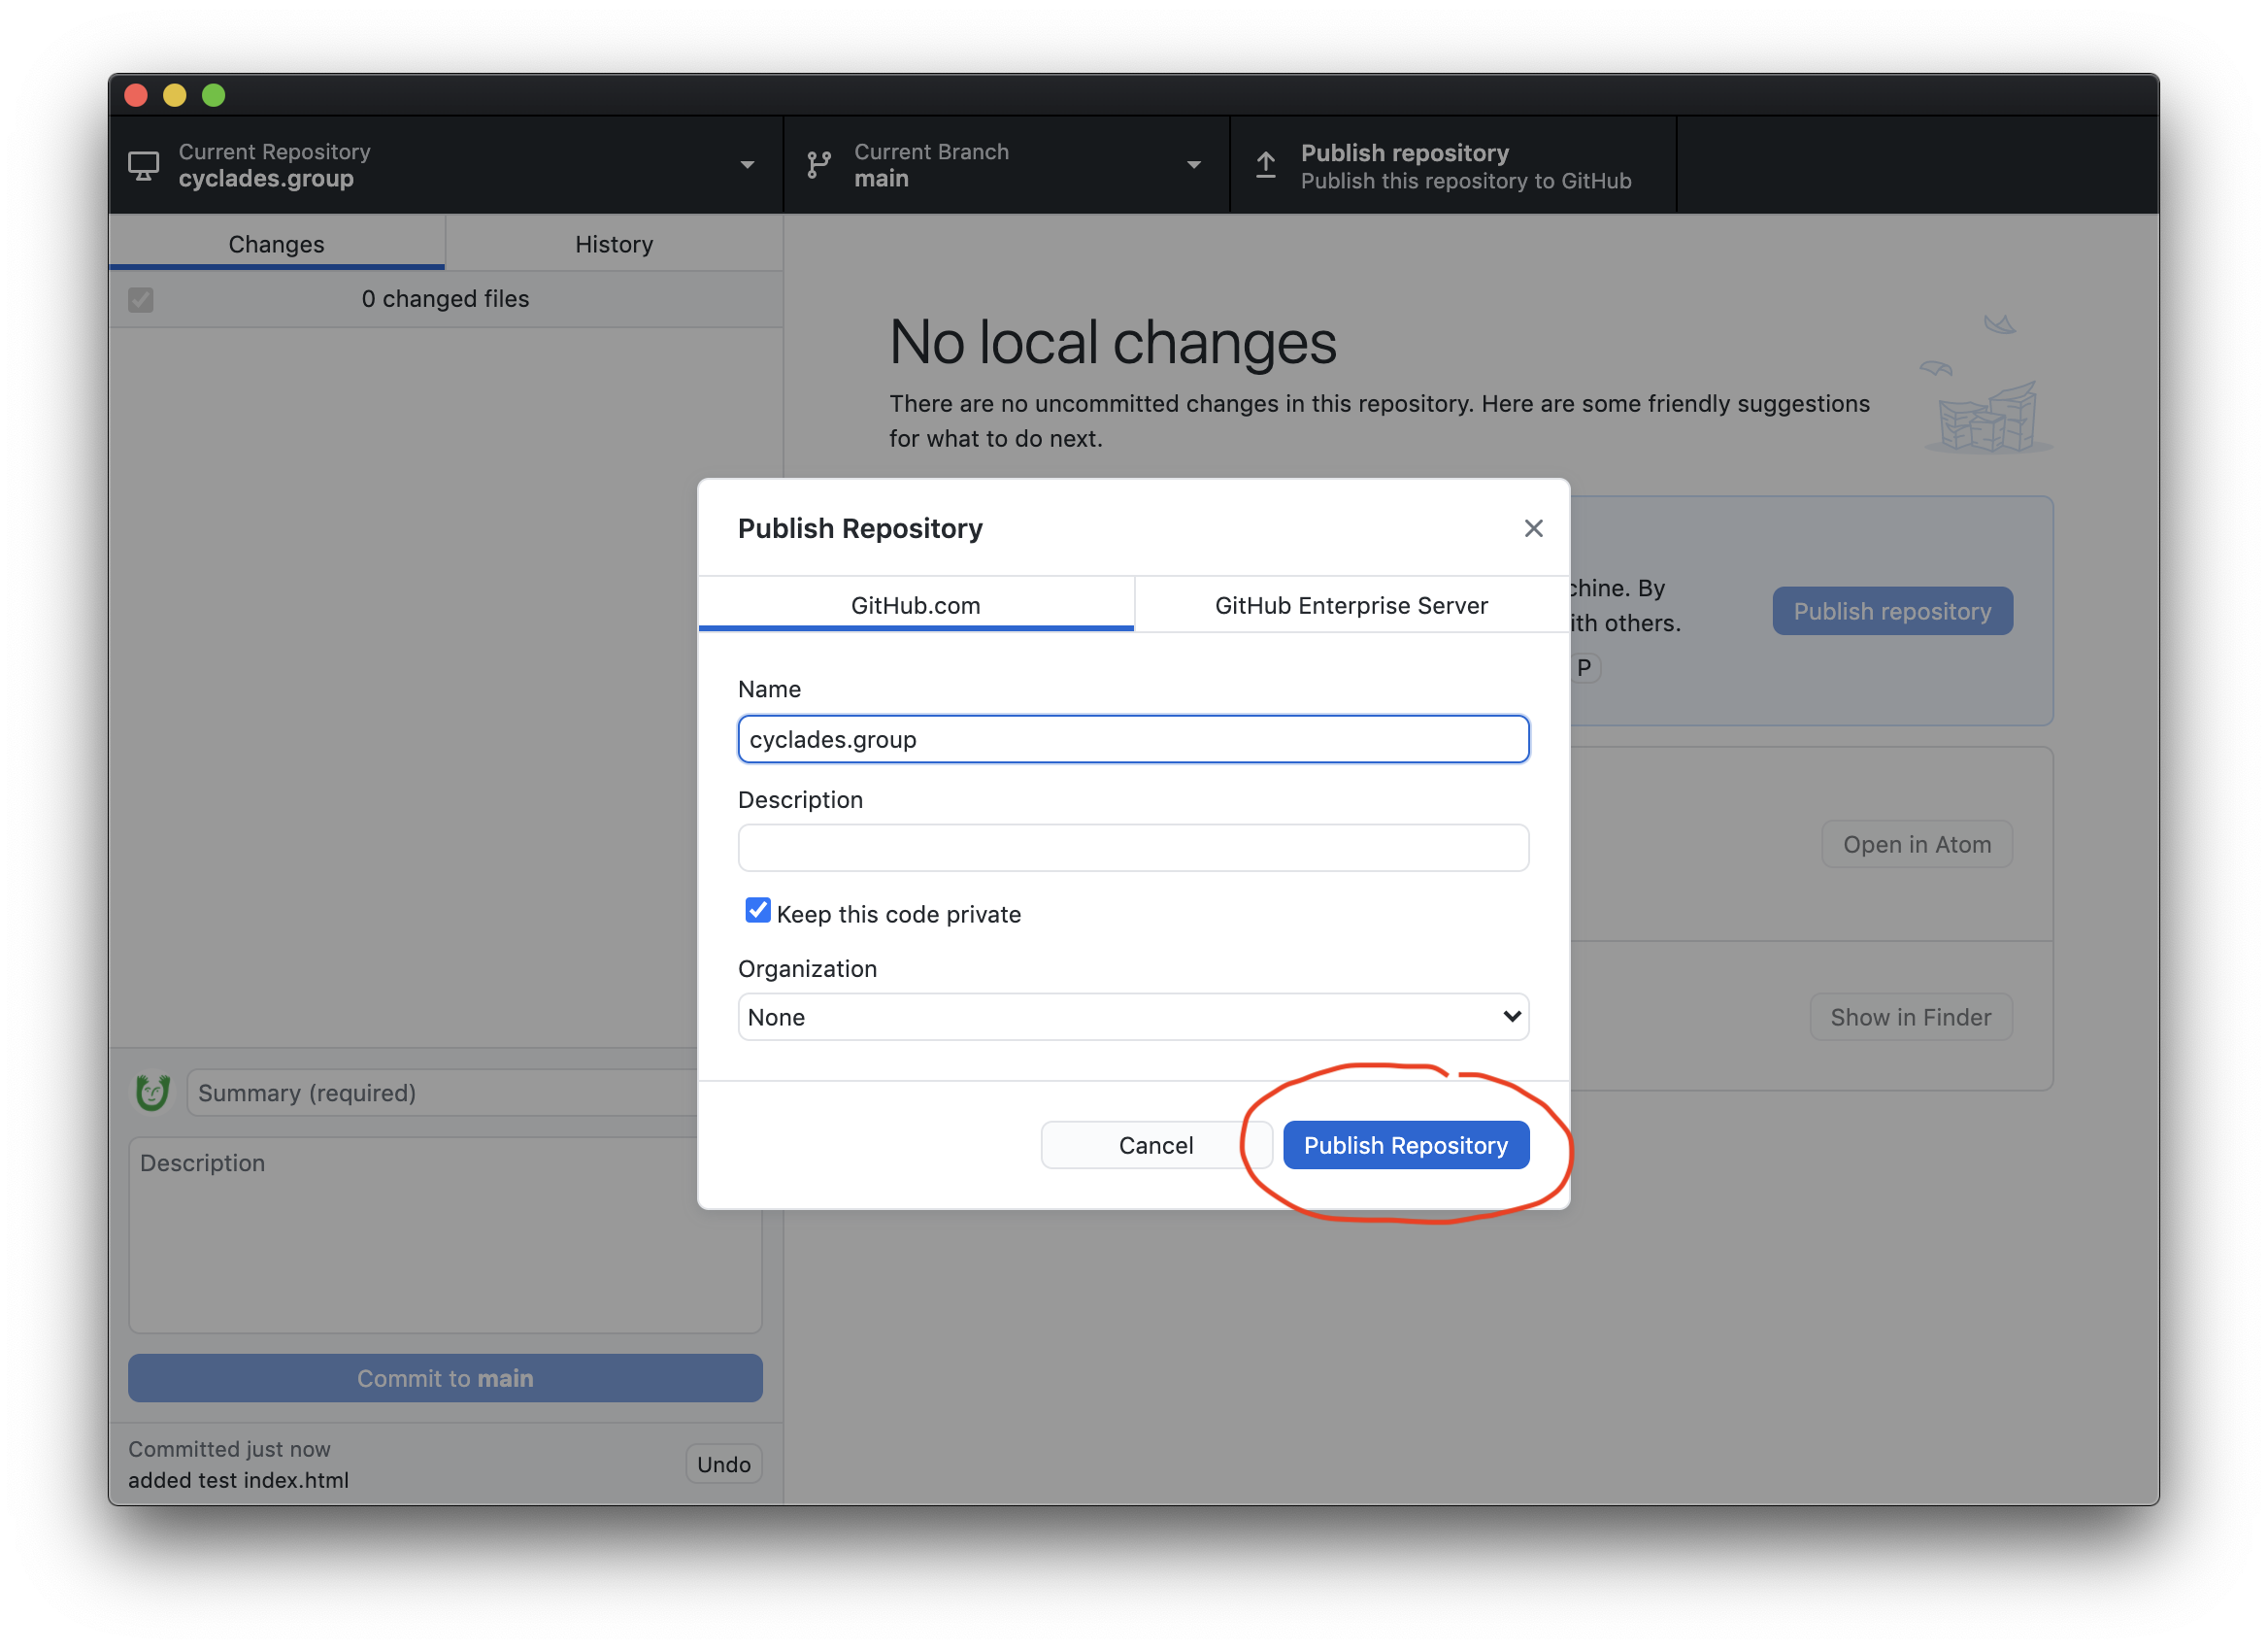
- Press the "Publish repository" button at the top.
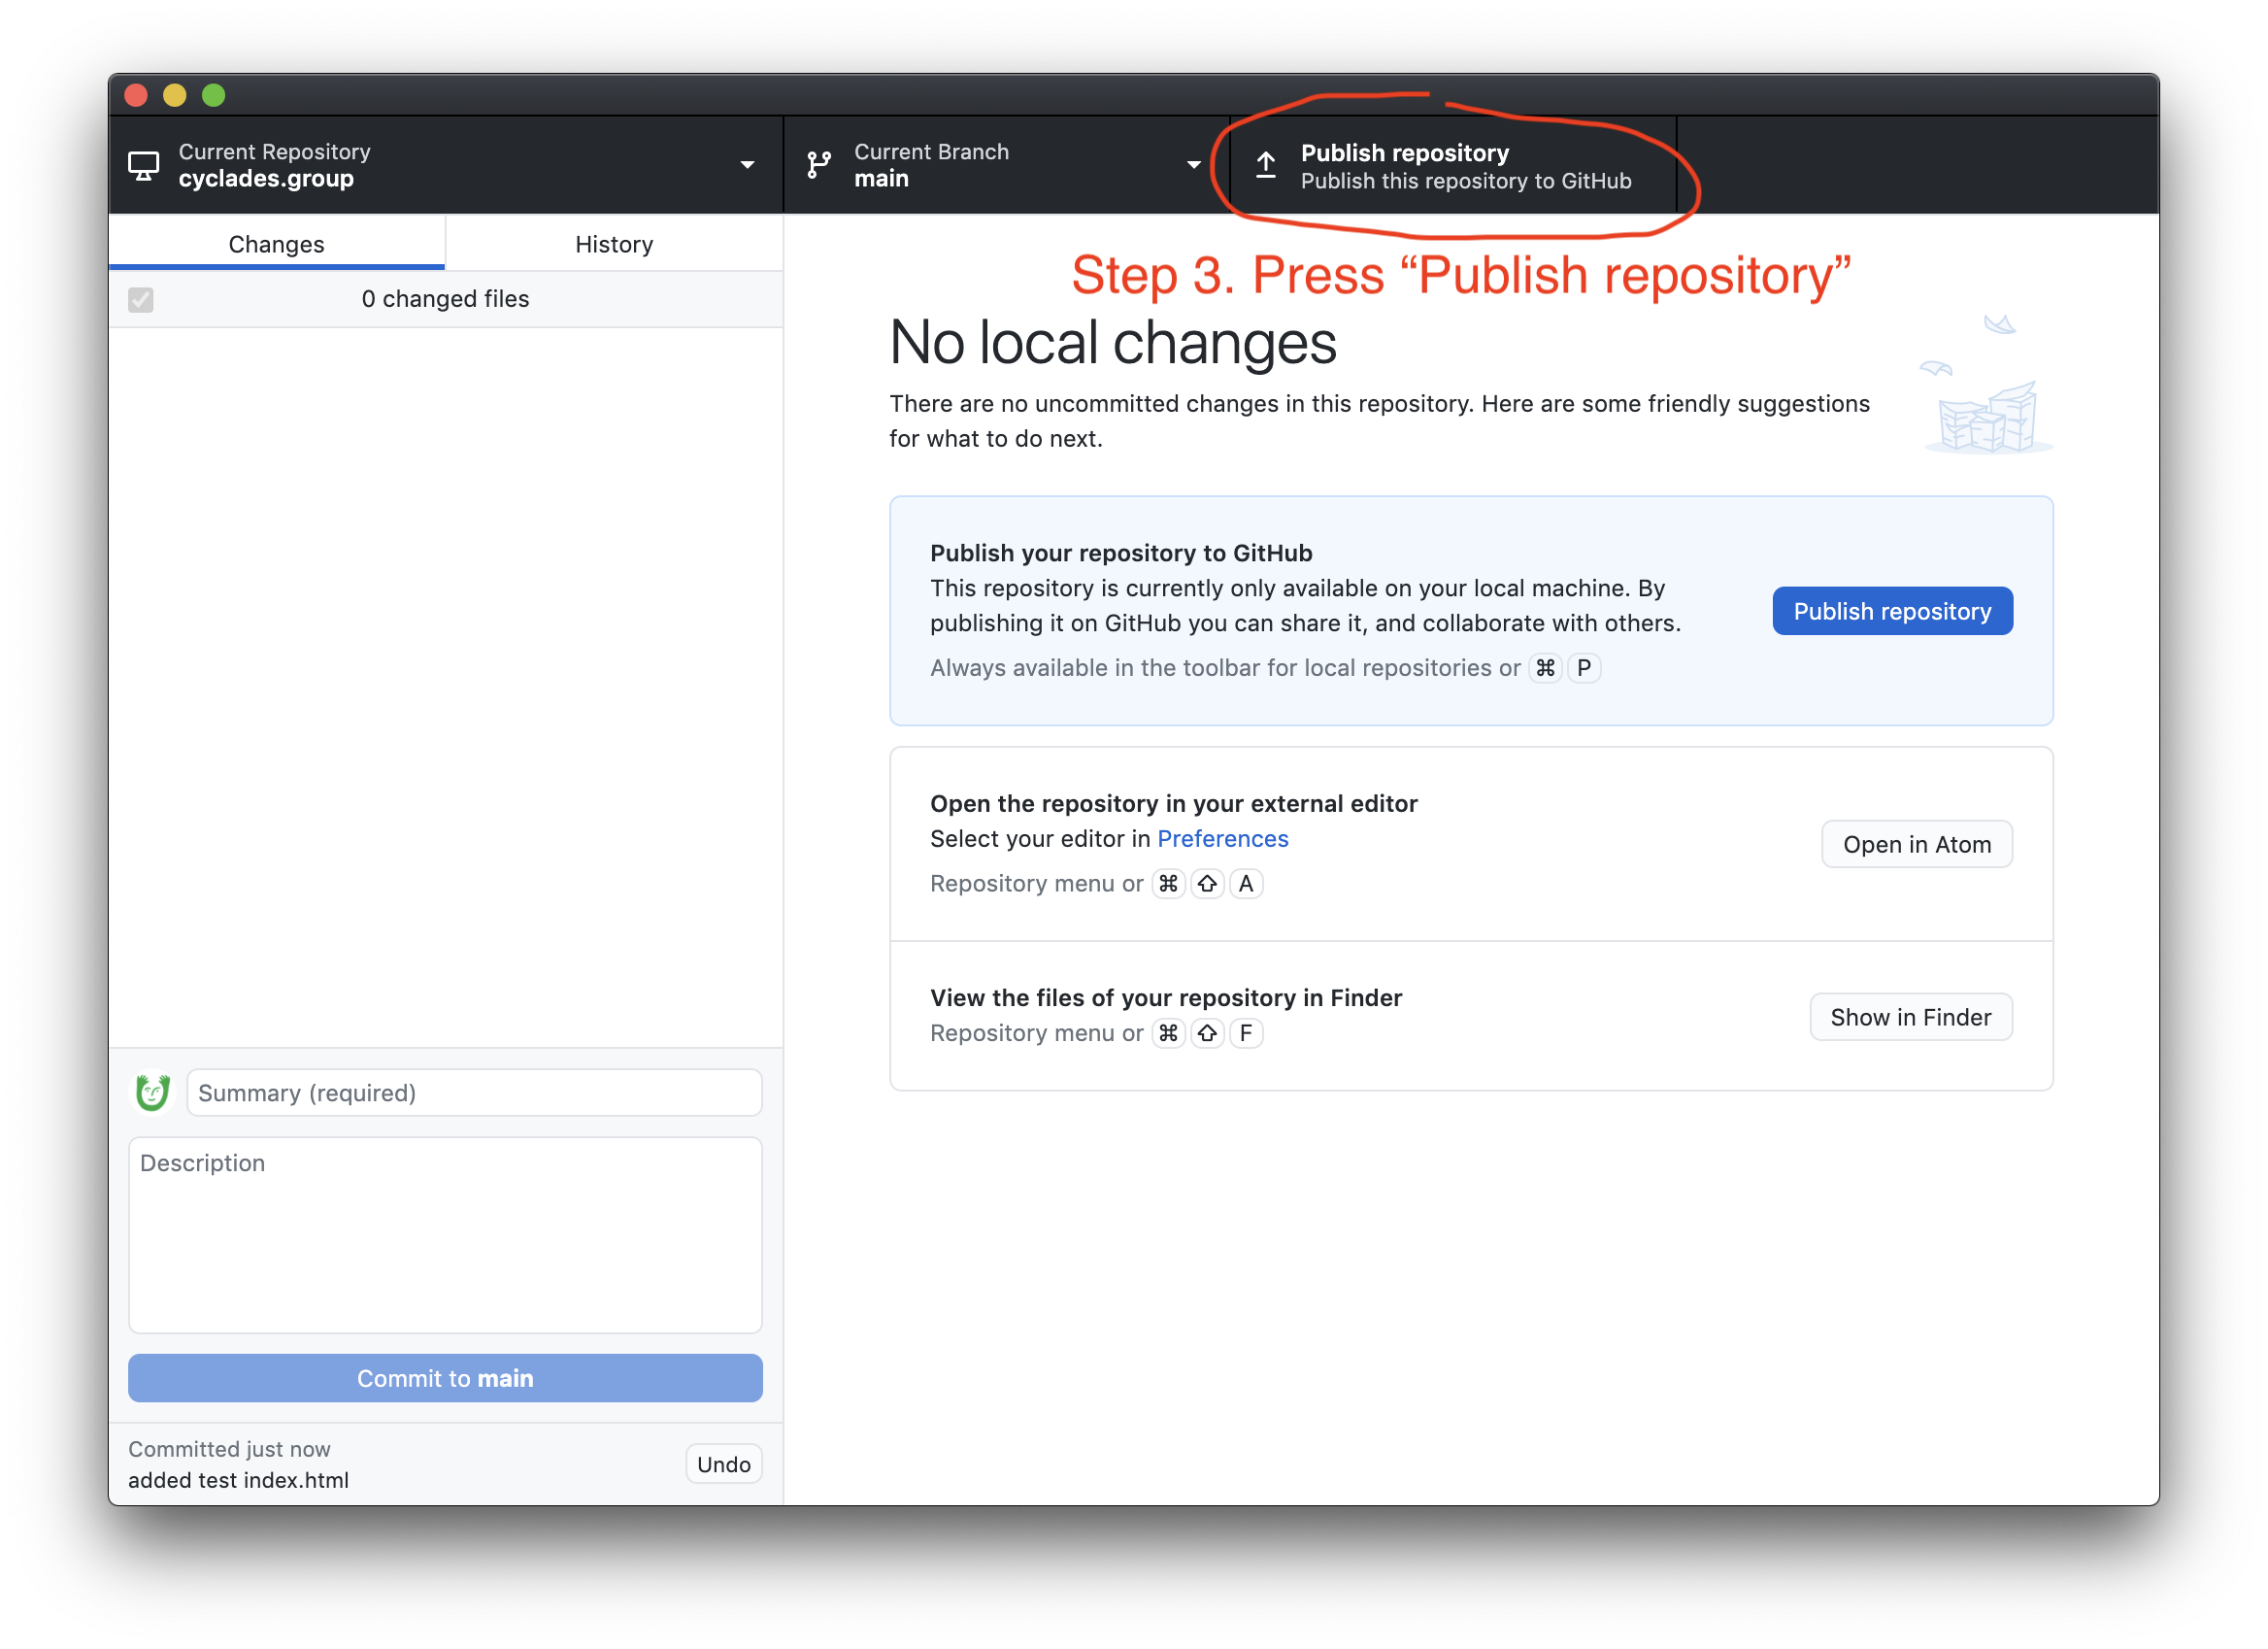
And finally, you'll get a popup. Press the blue "Publish Repository" button. (Up to you if you want to keep your code private or not.) This will make your local code on your computer go online, to your repository on GitHub.
3. Enable GitHub Pages on the repository
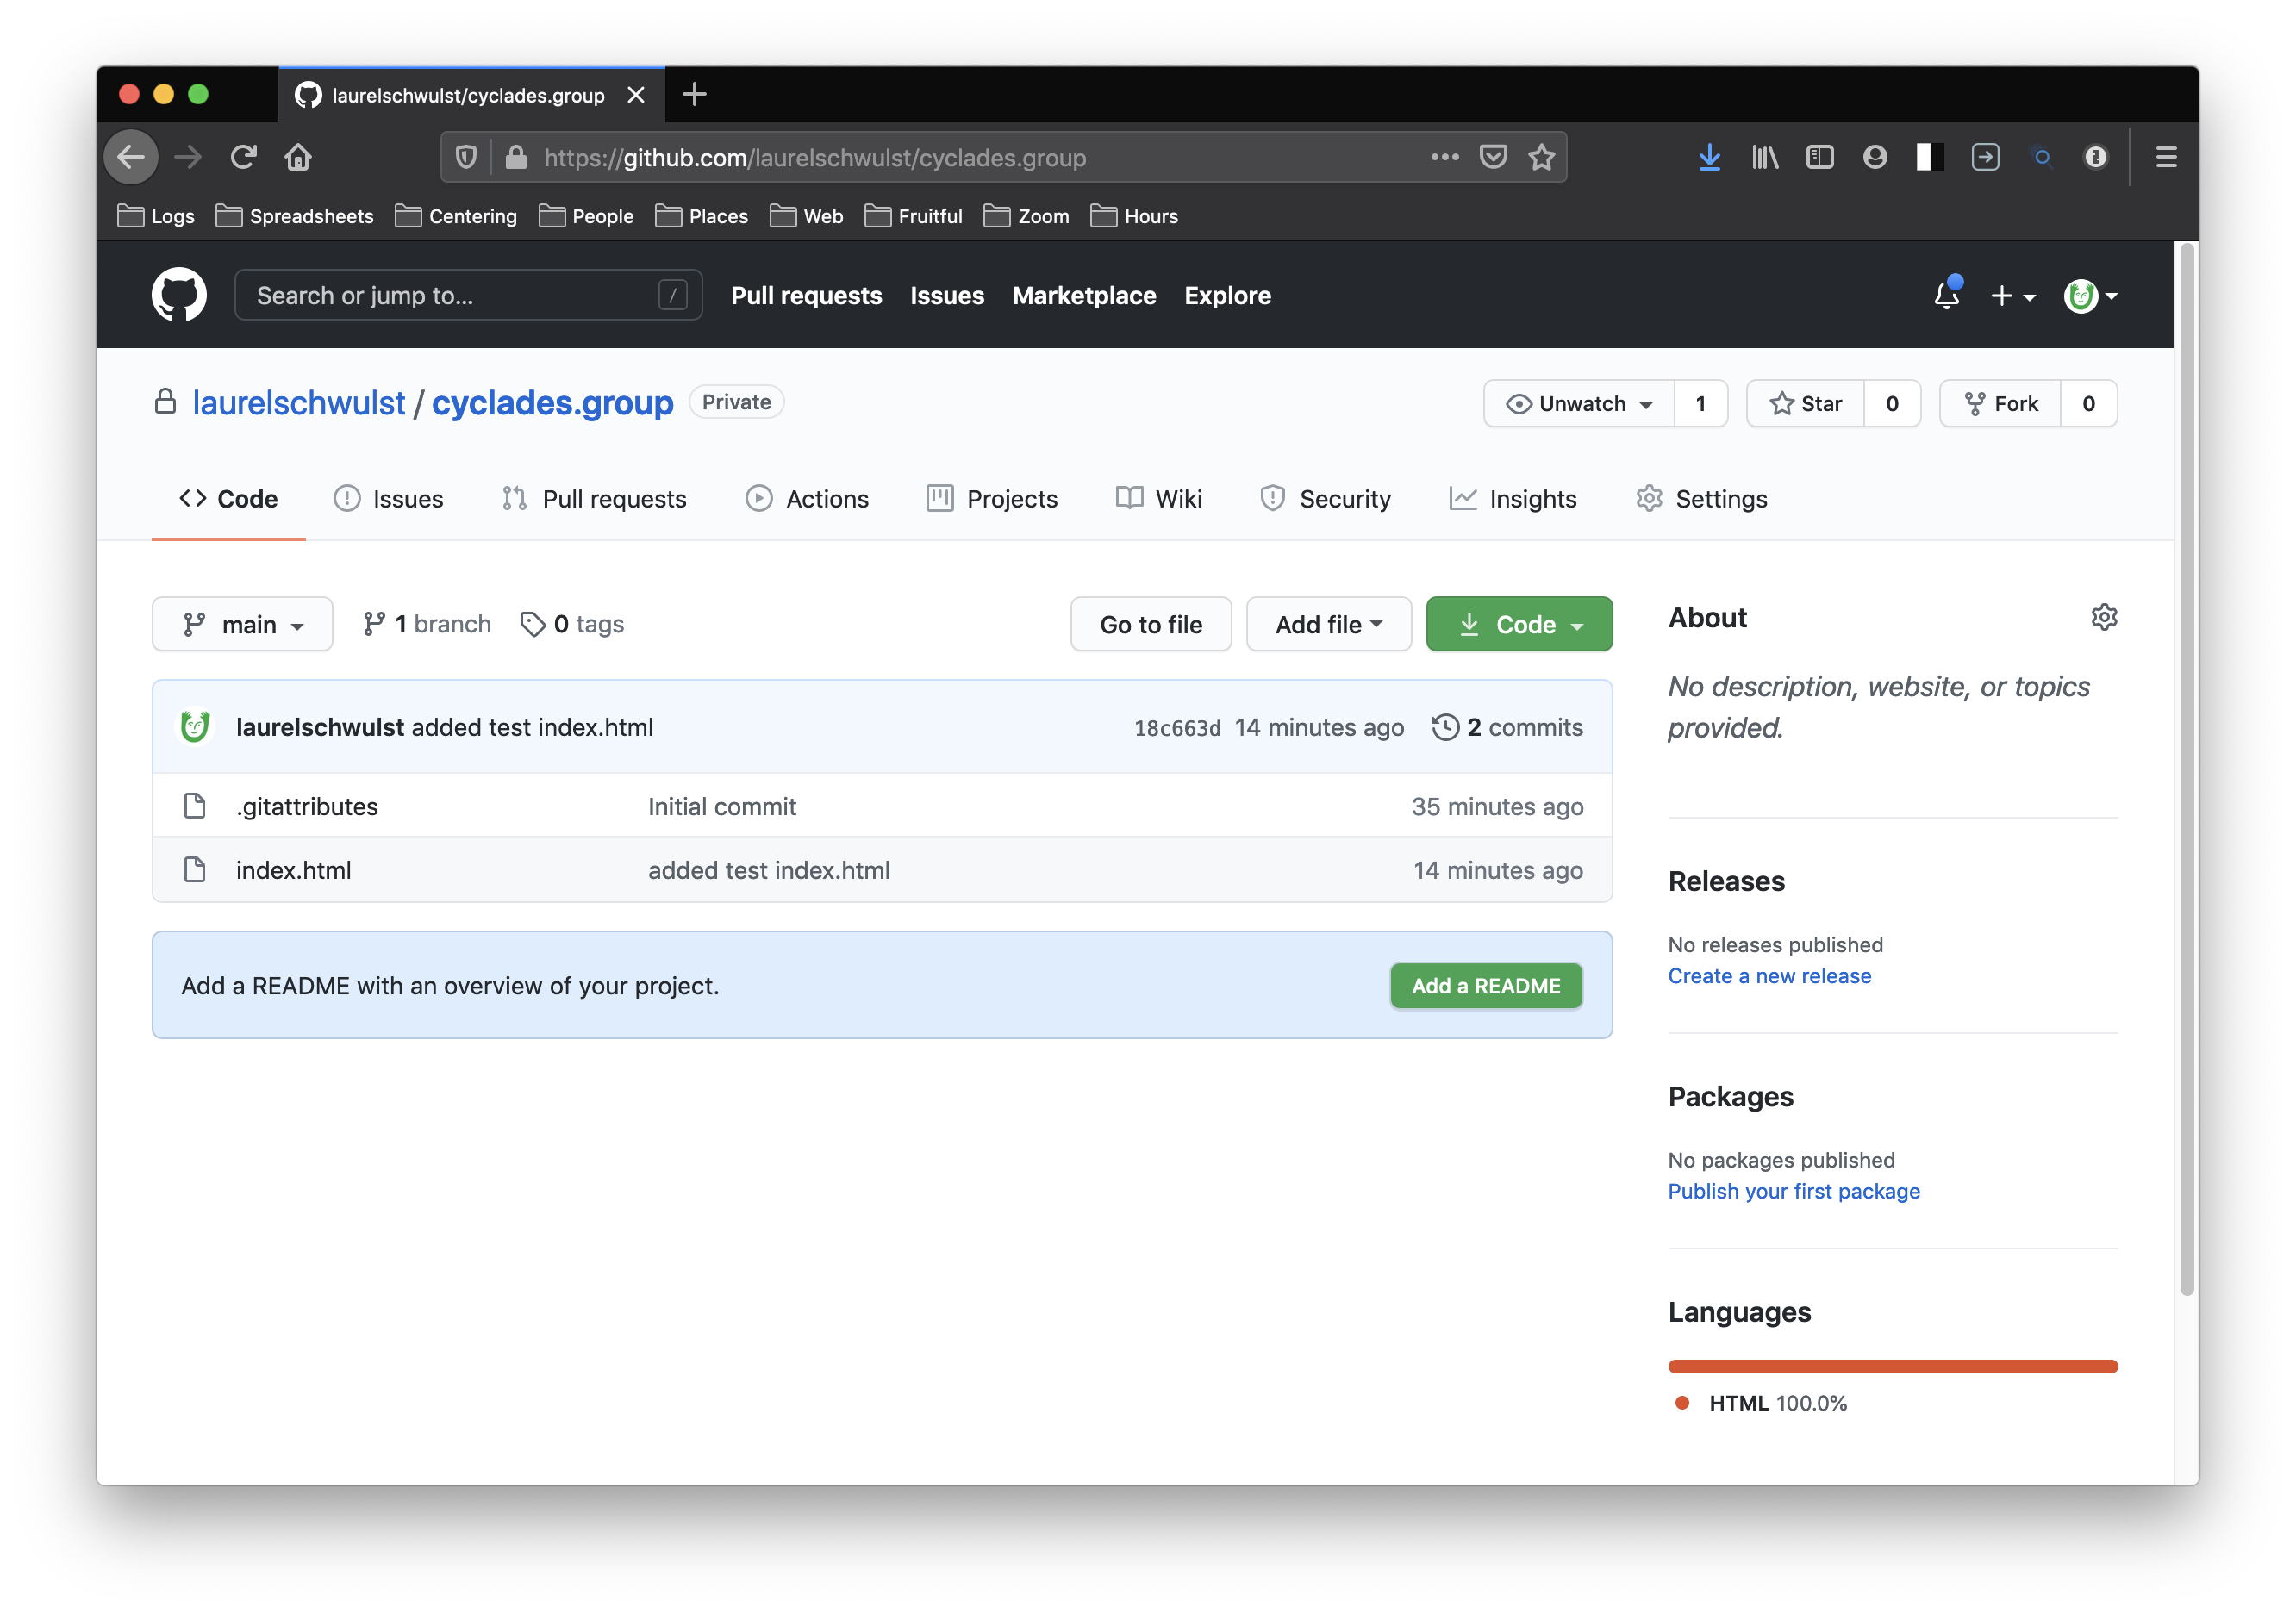
Now that we uploaded to GitHub, let's navigate to the repository's page on github.com. Make sure you're logged in.
The URL should be something like: `http://github.com/(your github username here)/(your repository name here)``
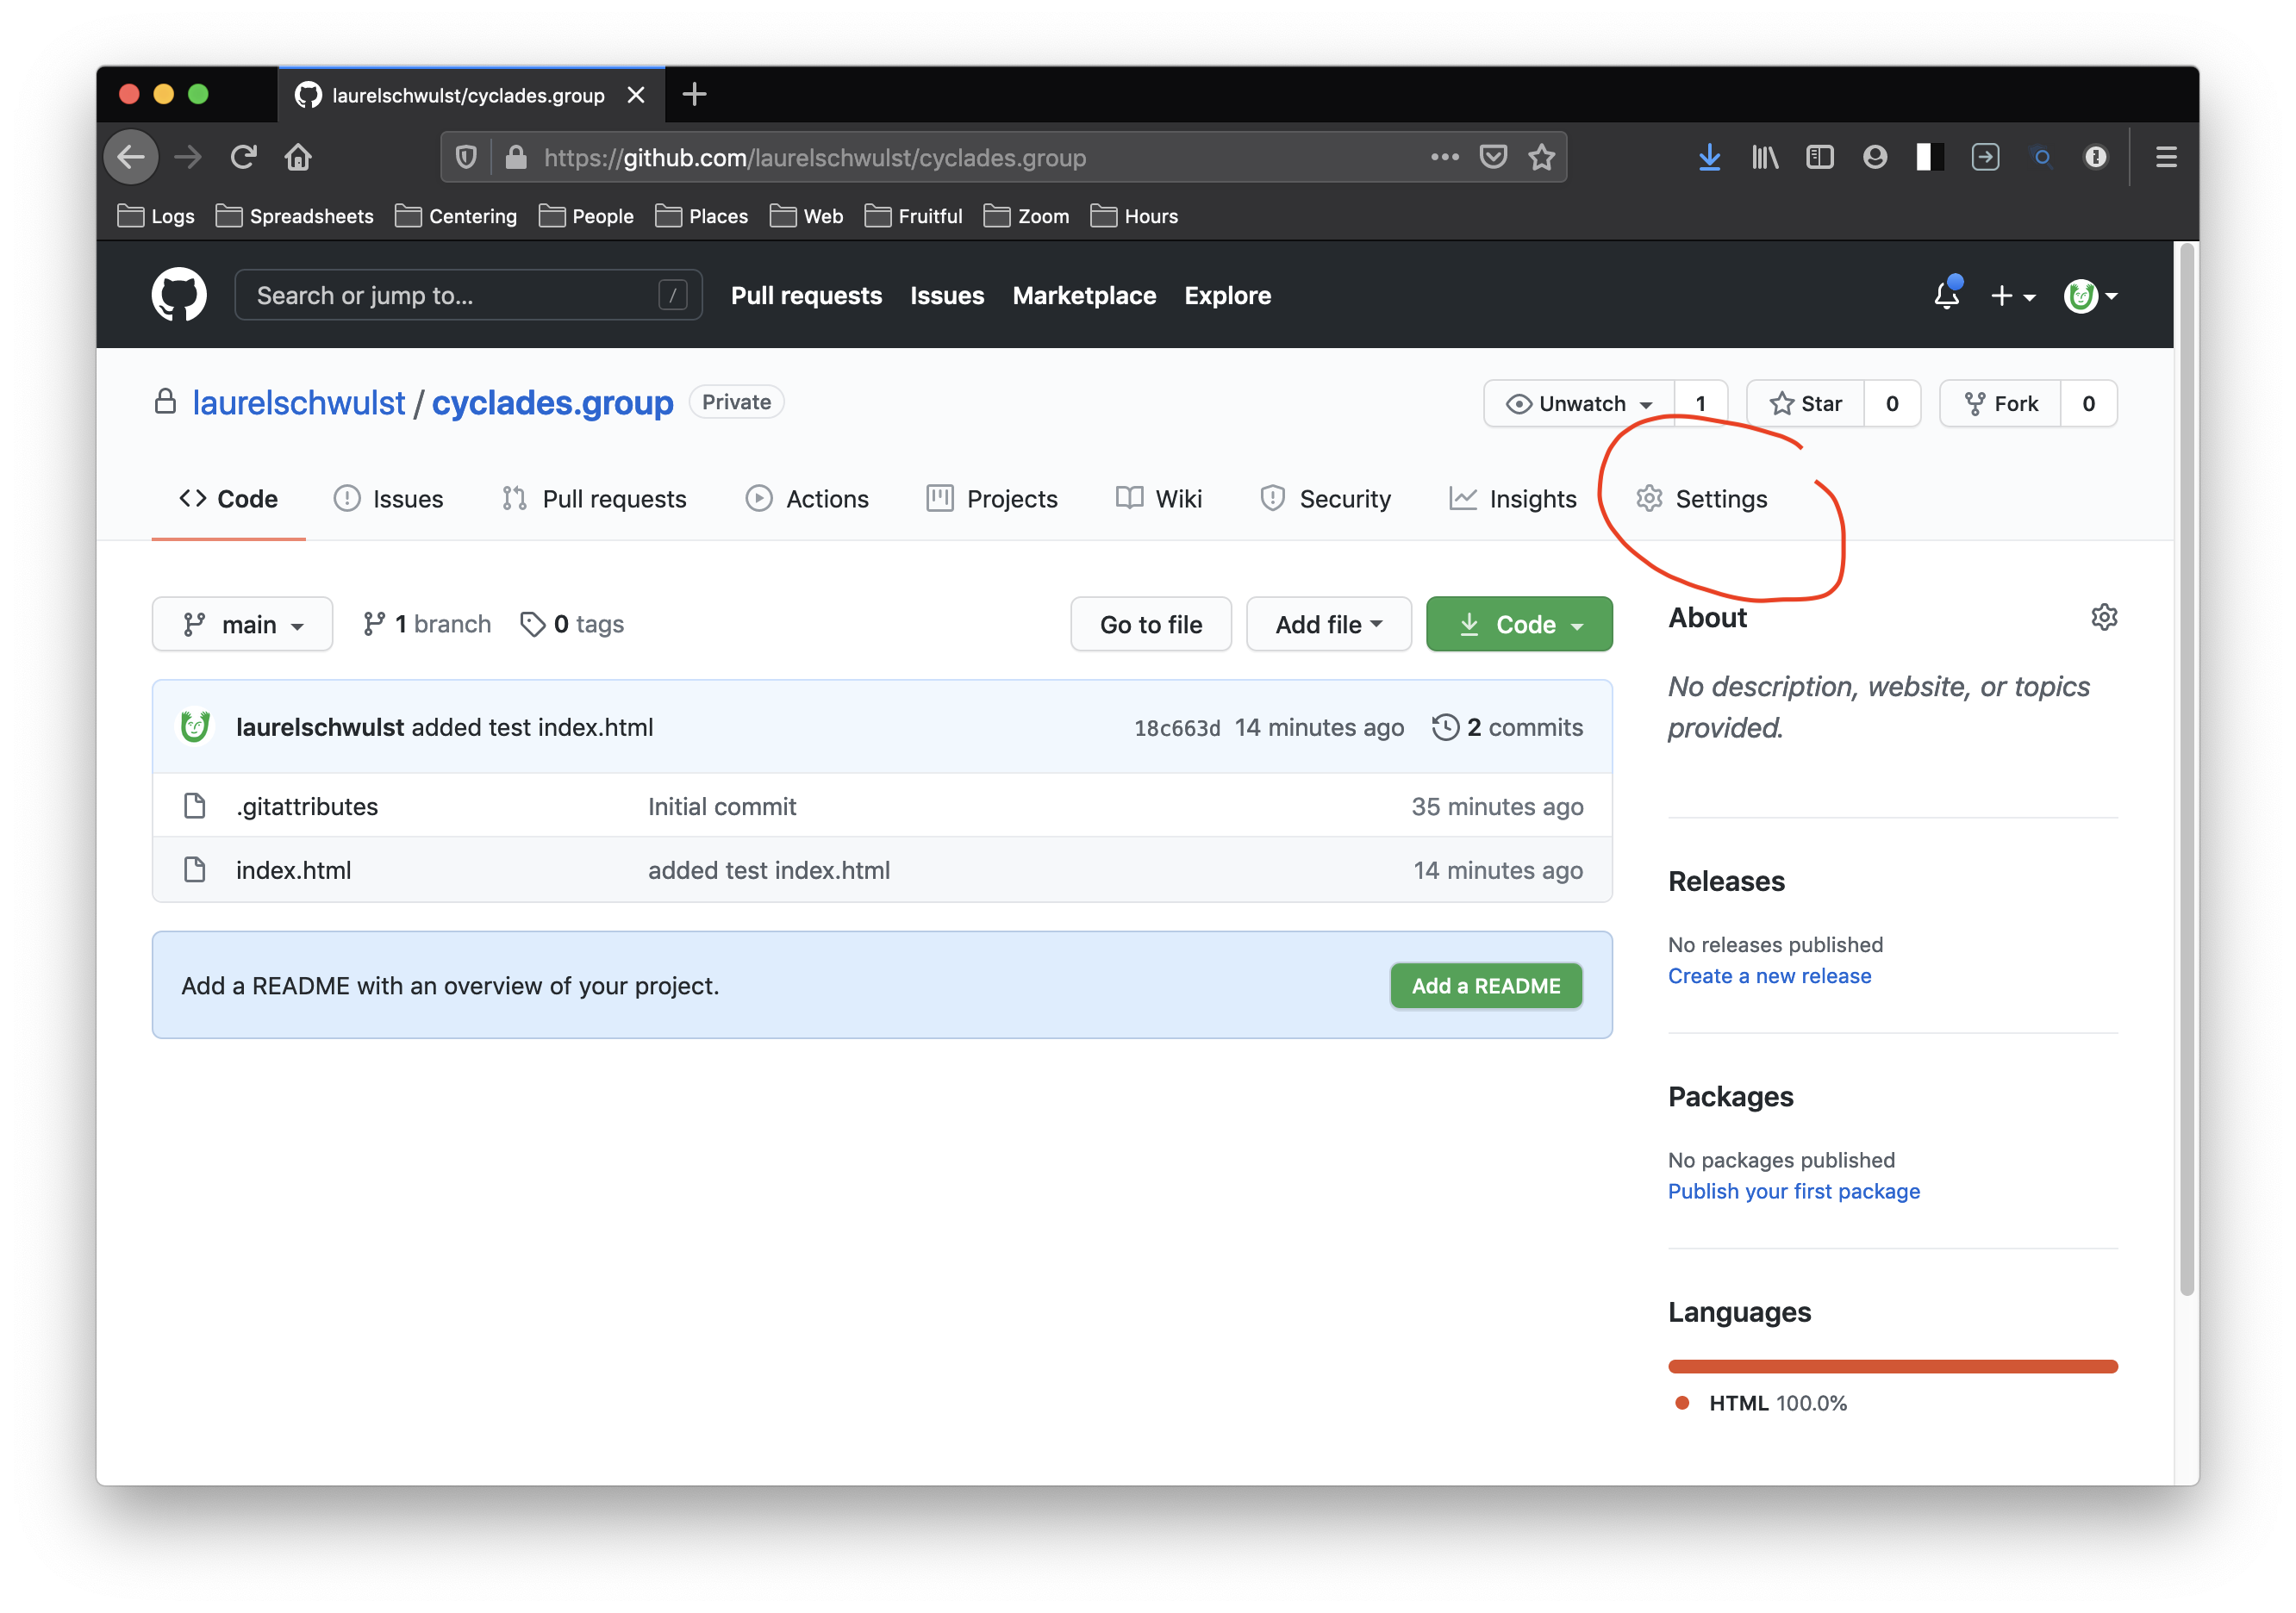
Then, click on "Settings" in the upper right area.
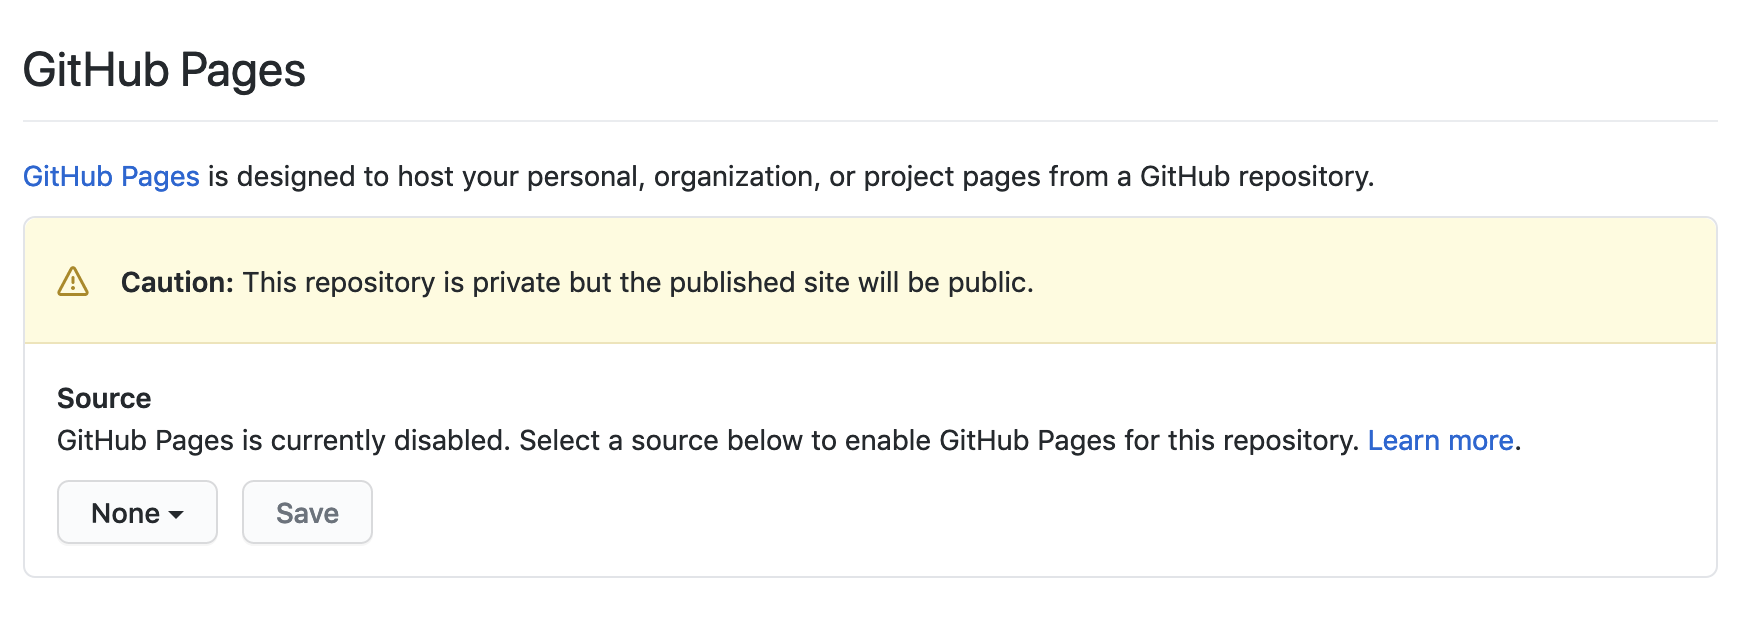
Once you're on the Settings page, scroll down to where it says "GitHub Pages". Where it says "Source", select the dropdown and choose "main". Then press "Save" to the right.
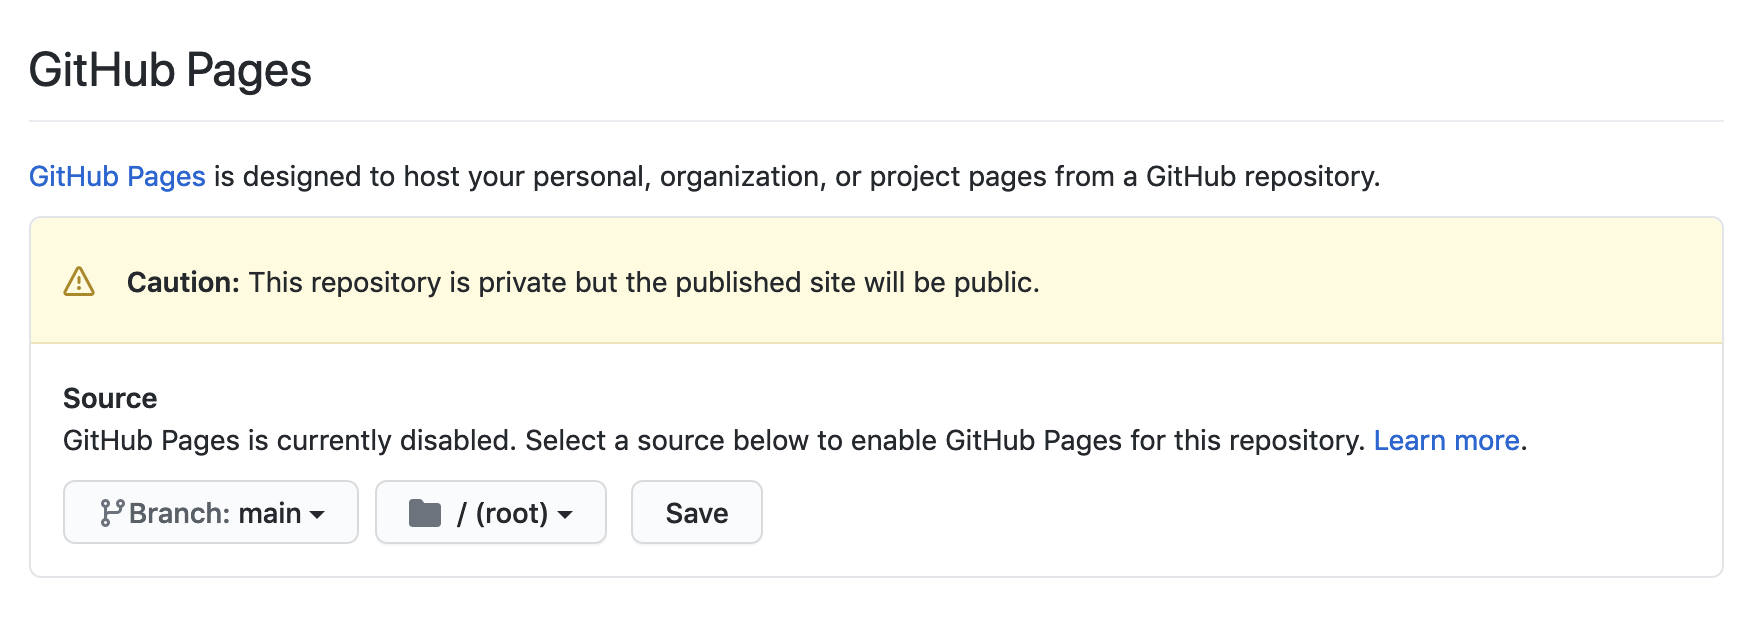
4. Test that the hosting works on the temporary URL given
Once you press "Save", the Settings page will reload. Scroll back down to where it says "GitHub Pages", and you'll find a line that says:

Your site is ready to be published at: `https://(your github username).github.io/(your repository name)``
Click this link. If you don't see anything at first, or get an error, try checking back in a few minutes. (Sometimes there is some lag with GitHub pages.)
Eventually, you should get something like this...
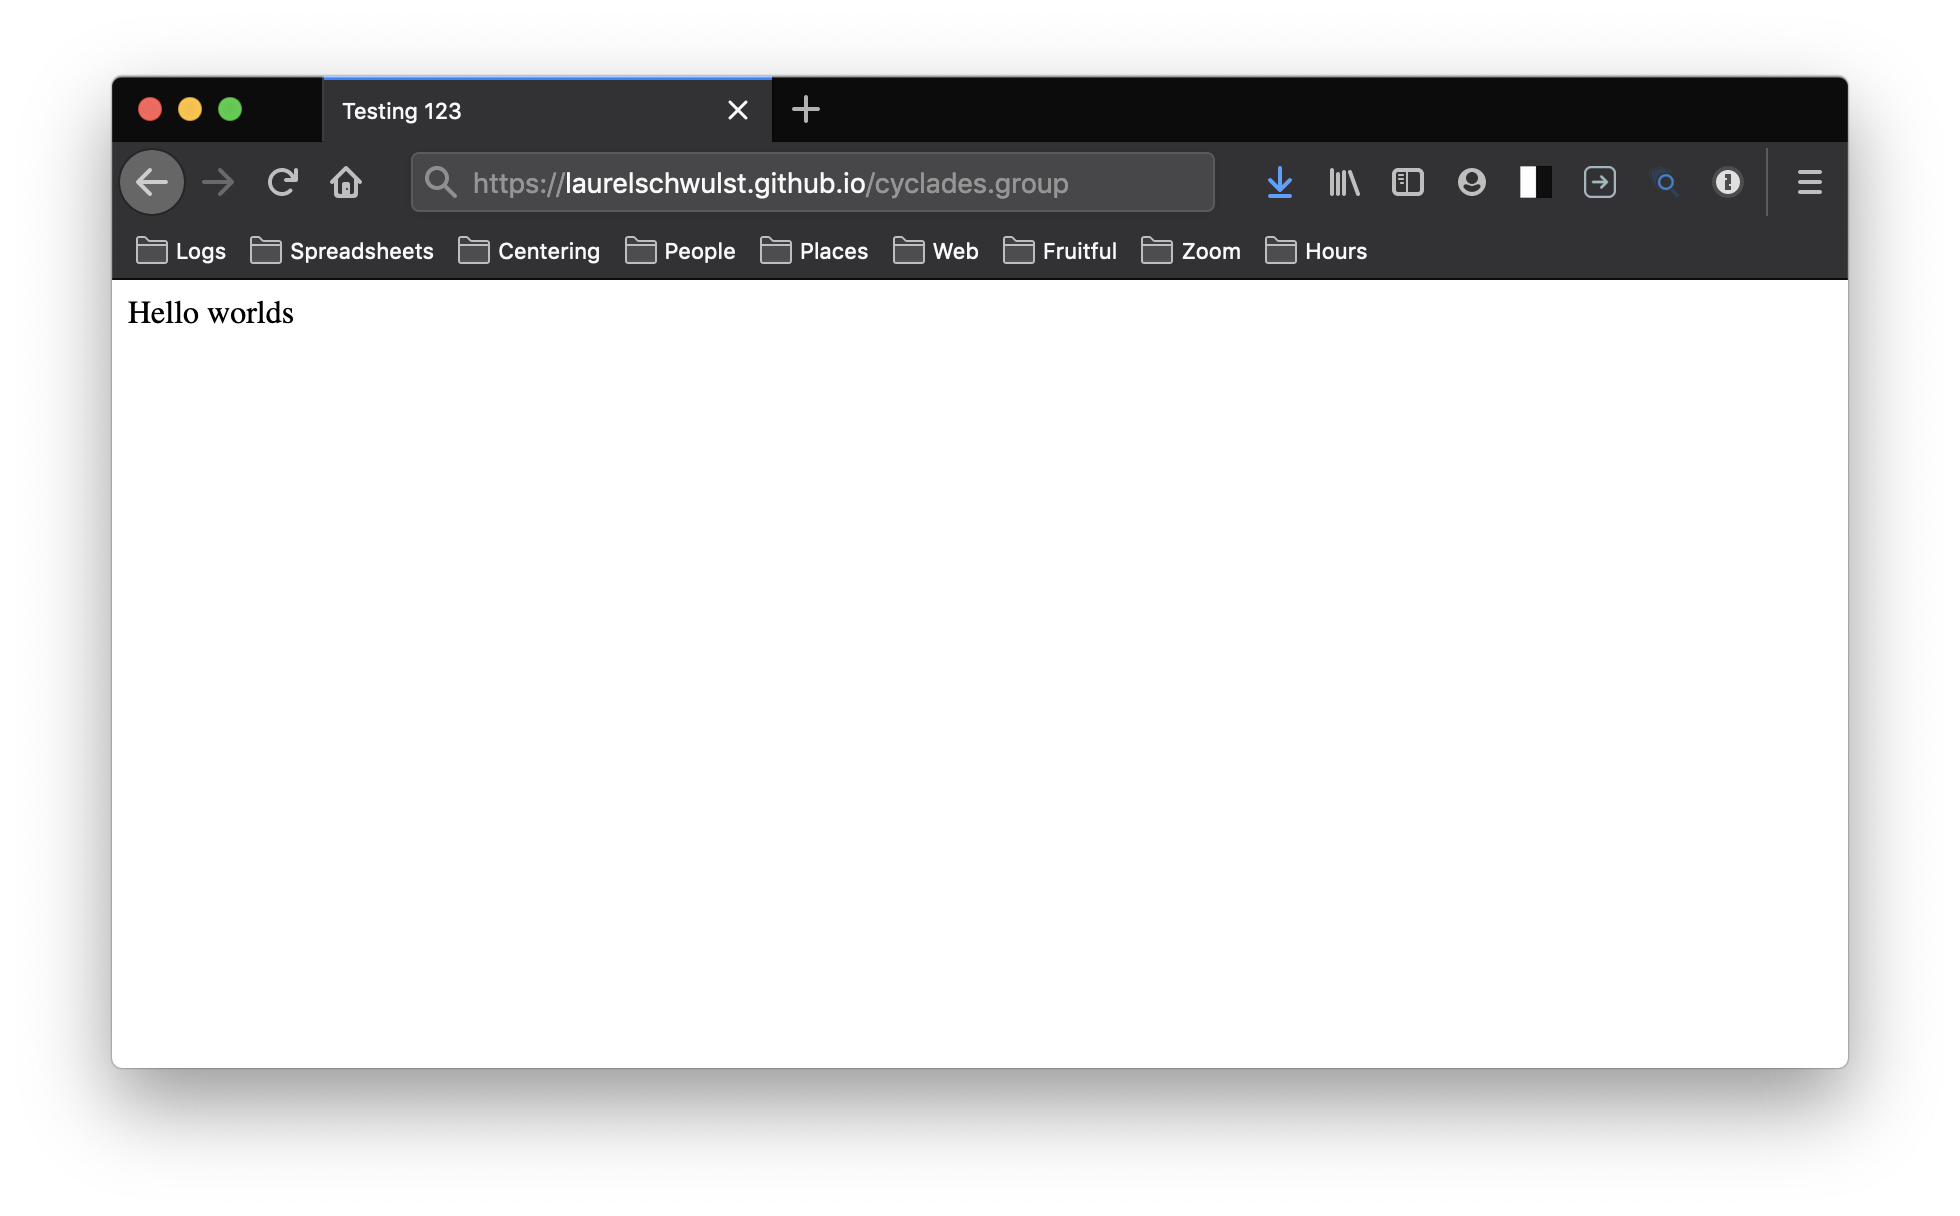
It works!
Connecting your hosting to your custom domain name
The below was adapted from this helpful article.
Steps:
- Enable "Custom domain" on the Settings page
- In your DNS registrar, add 4 A records and 1 CNAME record
1. Enable "Custom domain" on the Settings page
Go back to the “Settings” page for your repository and scroll back down to the “Github Pages” part. You should see an area that says “Custom domain.” Here you can type your custom domain. You don’t need to type the www part. Then press "save".

2. In your DNS registrar, add 4 A records and 1 CNAME record
Log into your DNS registrar. In our case, it's name.com.
Make the following additions to your DNS records for your chosen domain...
Add these A records:
185.199.108.153
185.199.109.153
185.199.110.153
185.199.111.153
Then add a CNAME record…
www (host)
yourusername.github.io (answer) ← remember to fill in your Github username here


If all of this is done correctly, you should be able to go to your custom domain and see the test site!
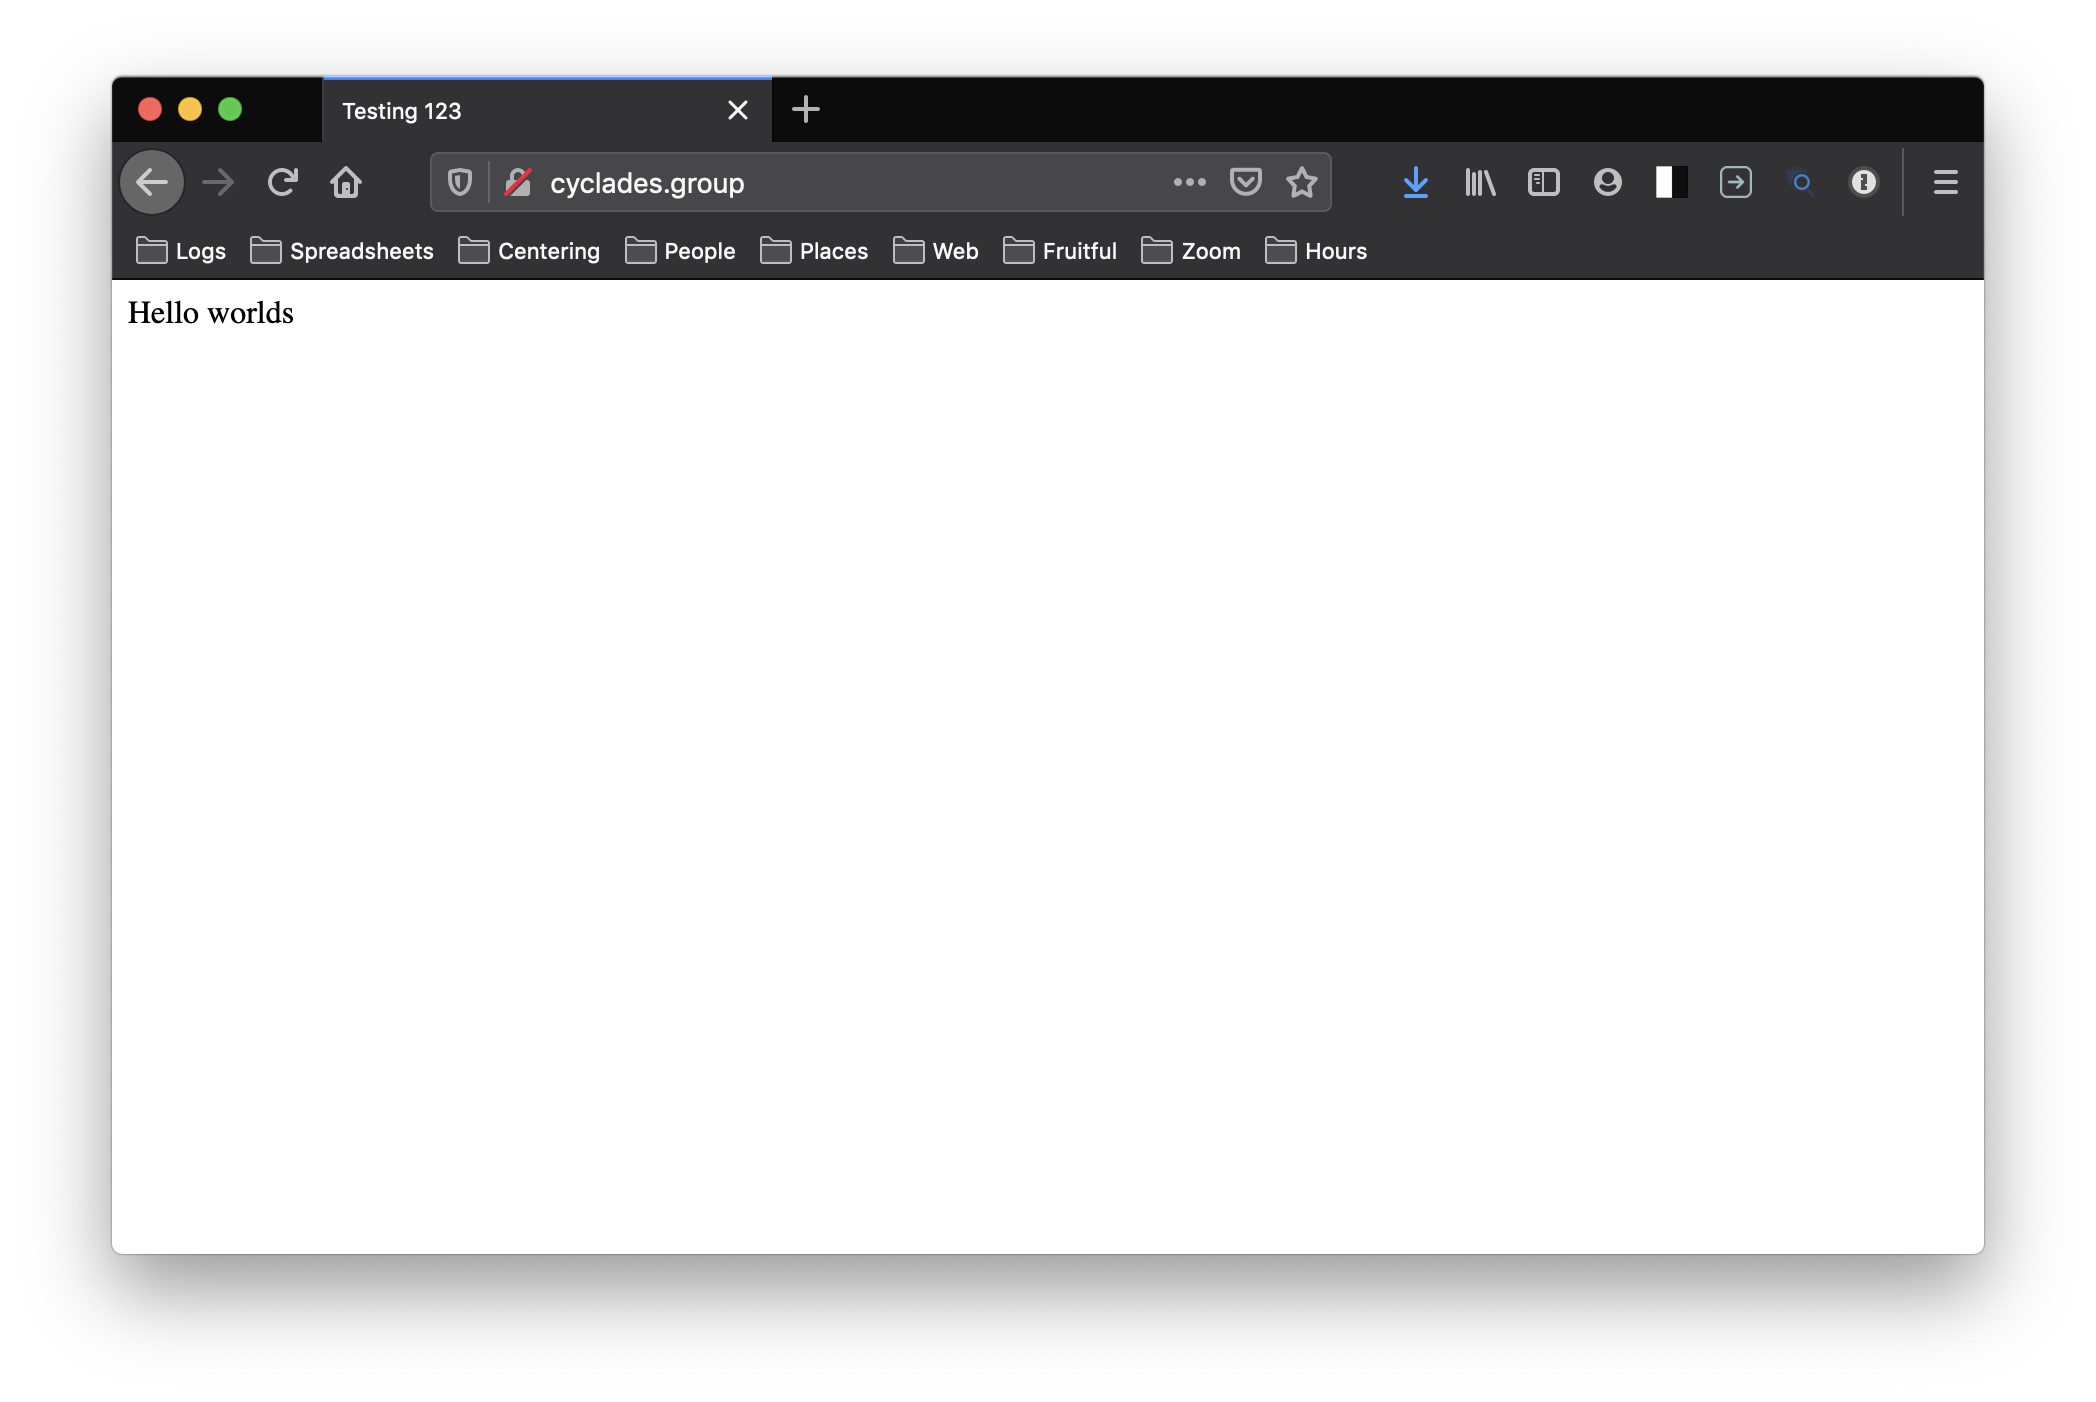
Now that we've tested it works, you can add all your final site's content to the repository's folder on your computer...
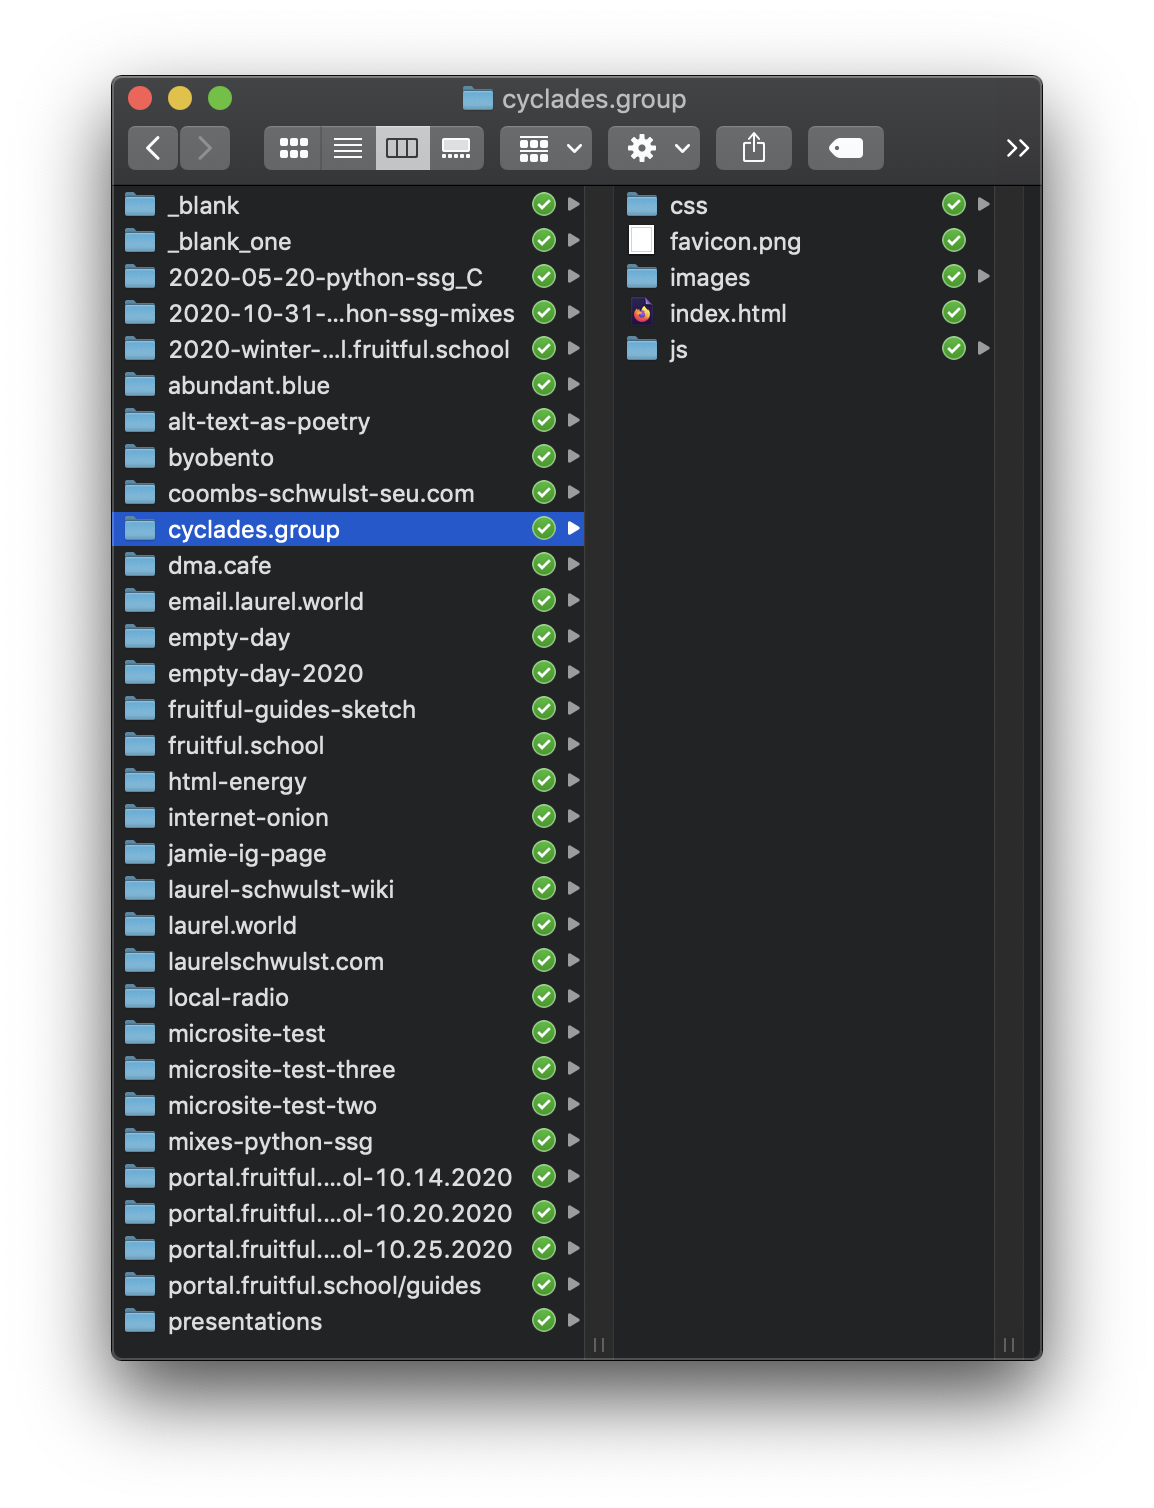
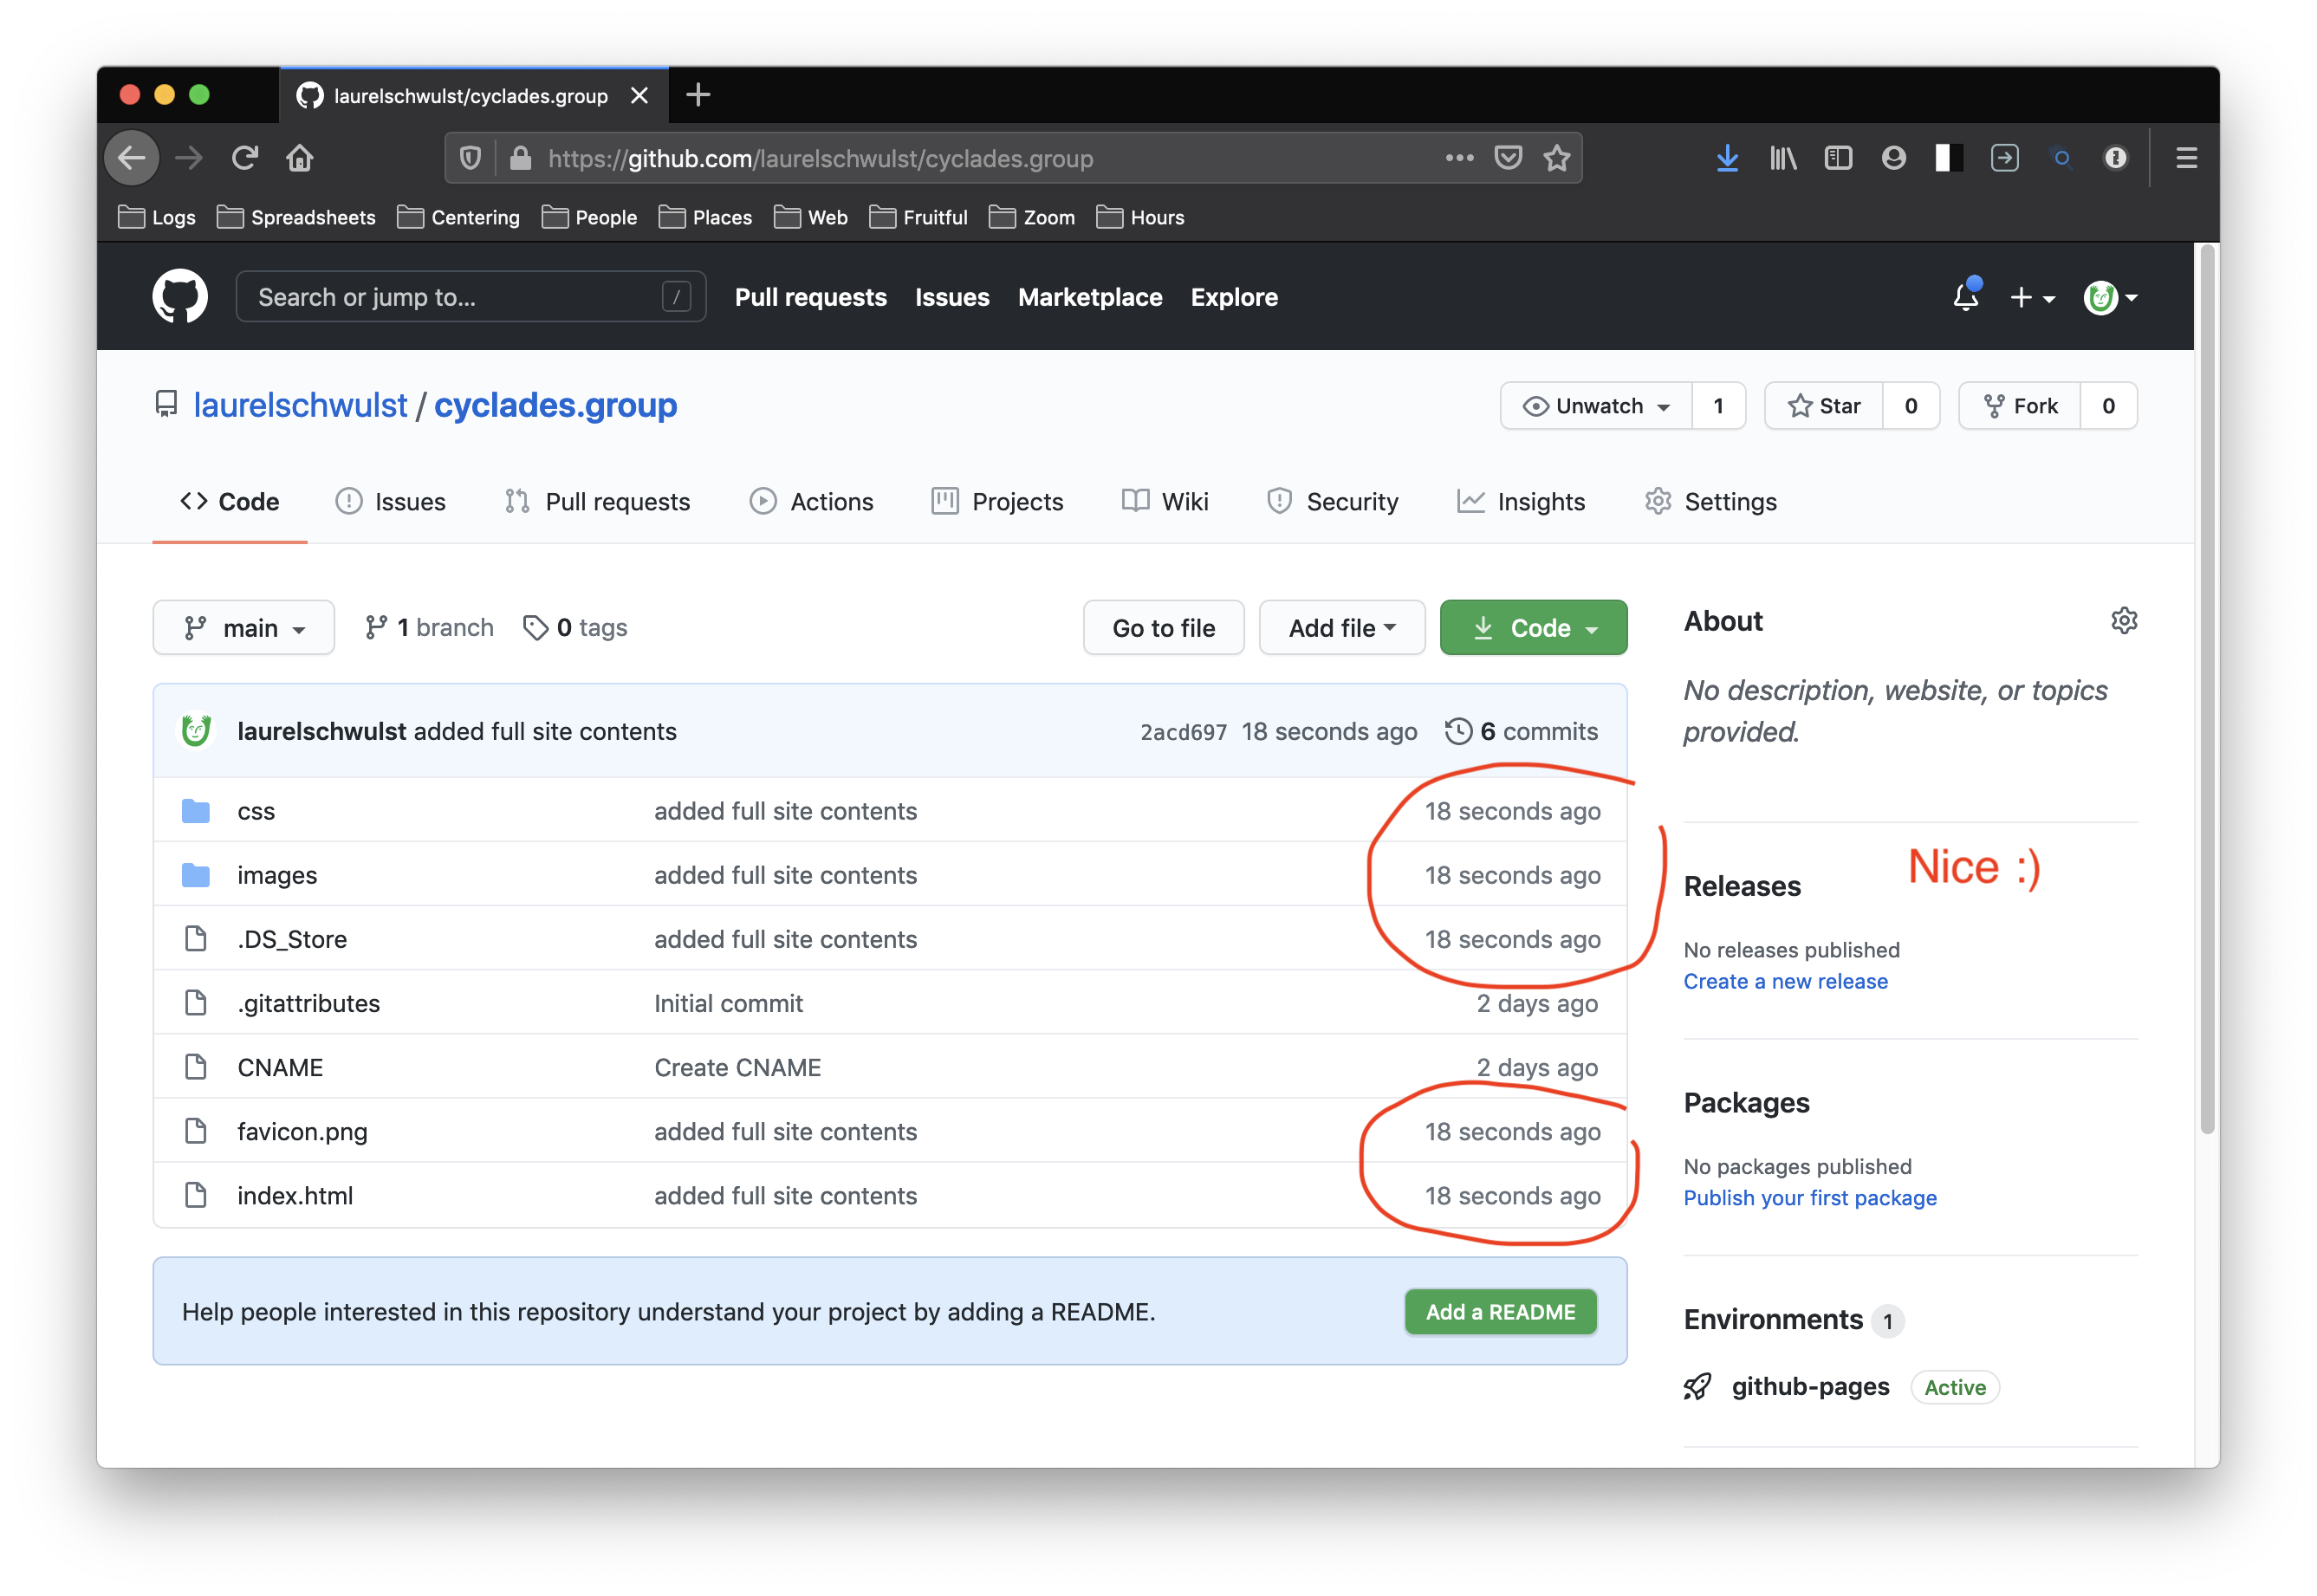
In the above image, you see we added our complete site's files, organized into folders for css, js, and images assets. You can divide your site however you want, this is just showing one possible way.
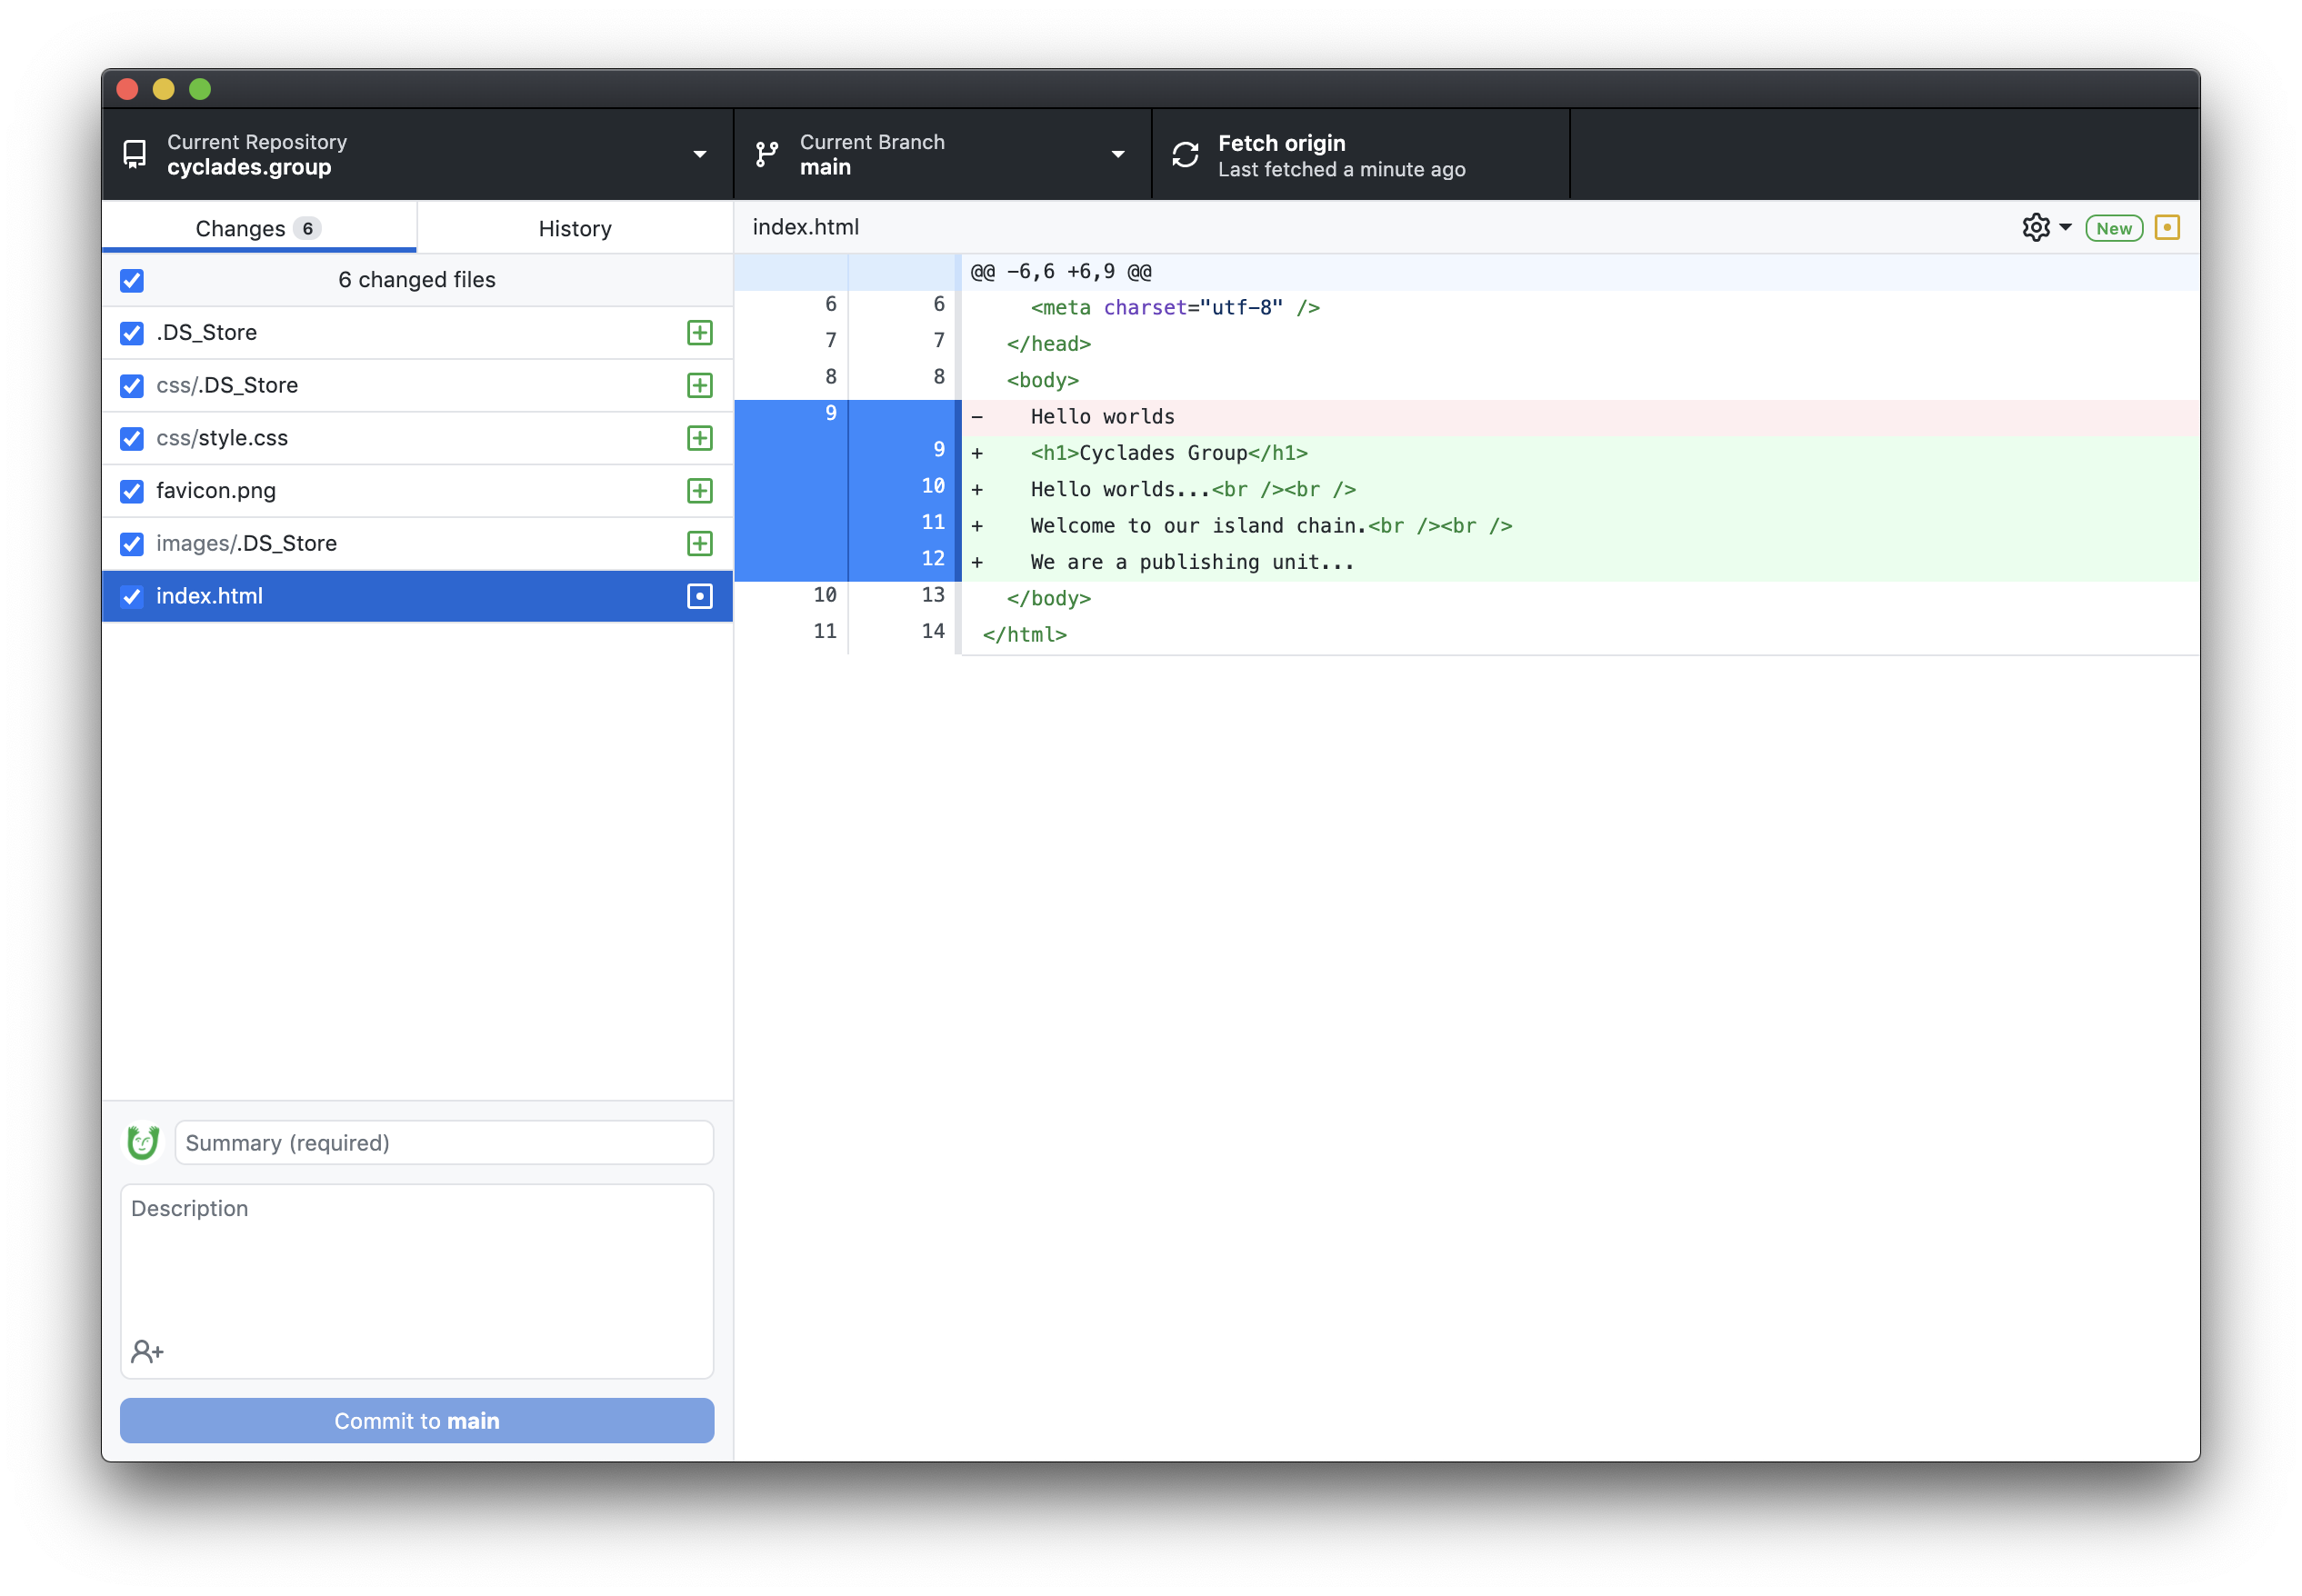
Once you add the new files, then open up GitHub Desktop, and you'll see it notices changes! (Note the green and red highlighting... things deleted and added, respectively.)
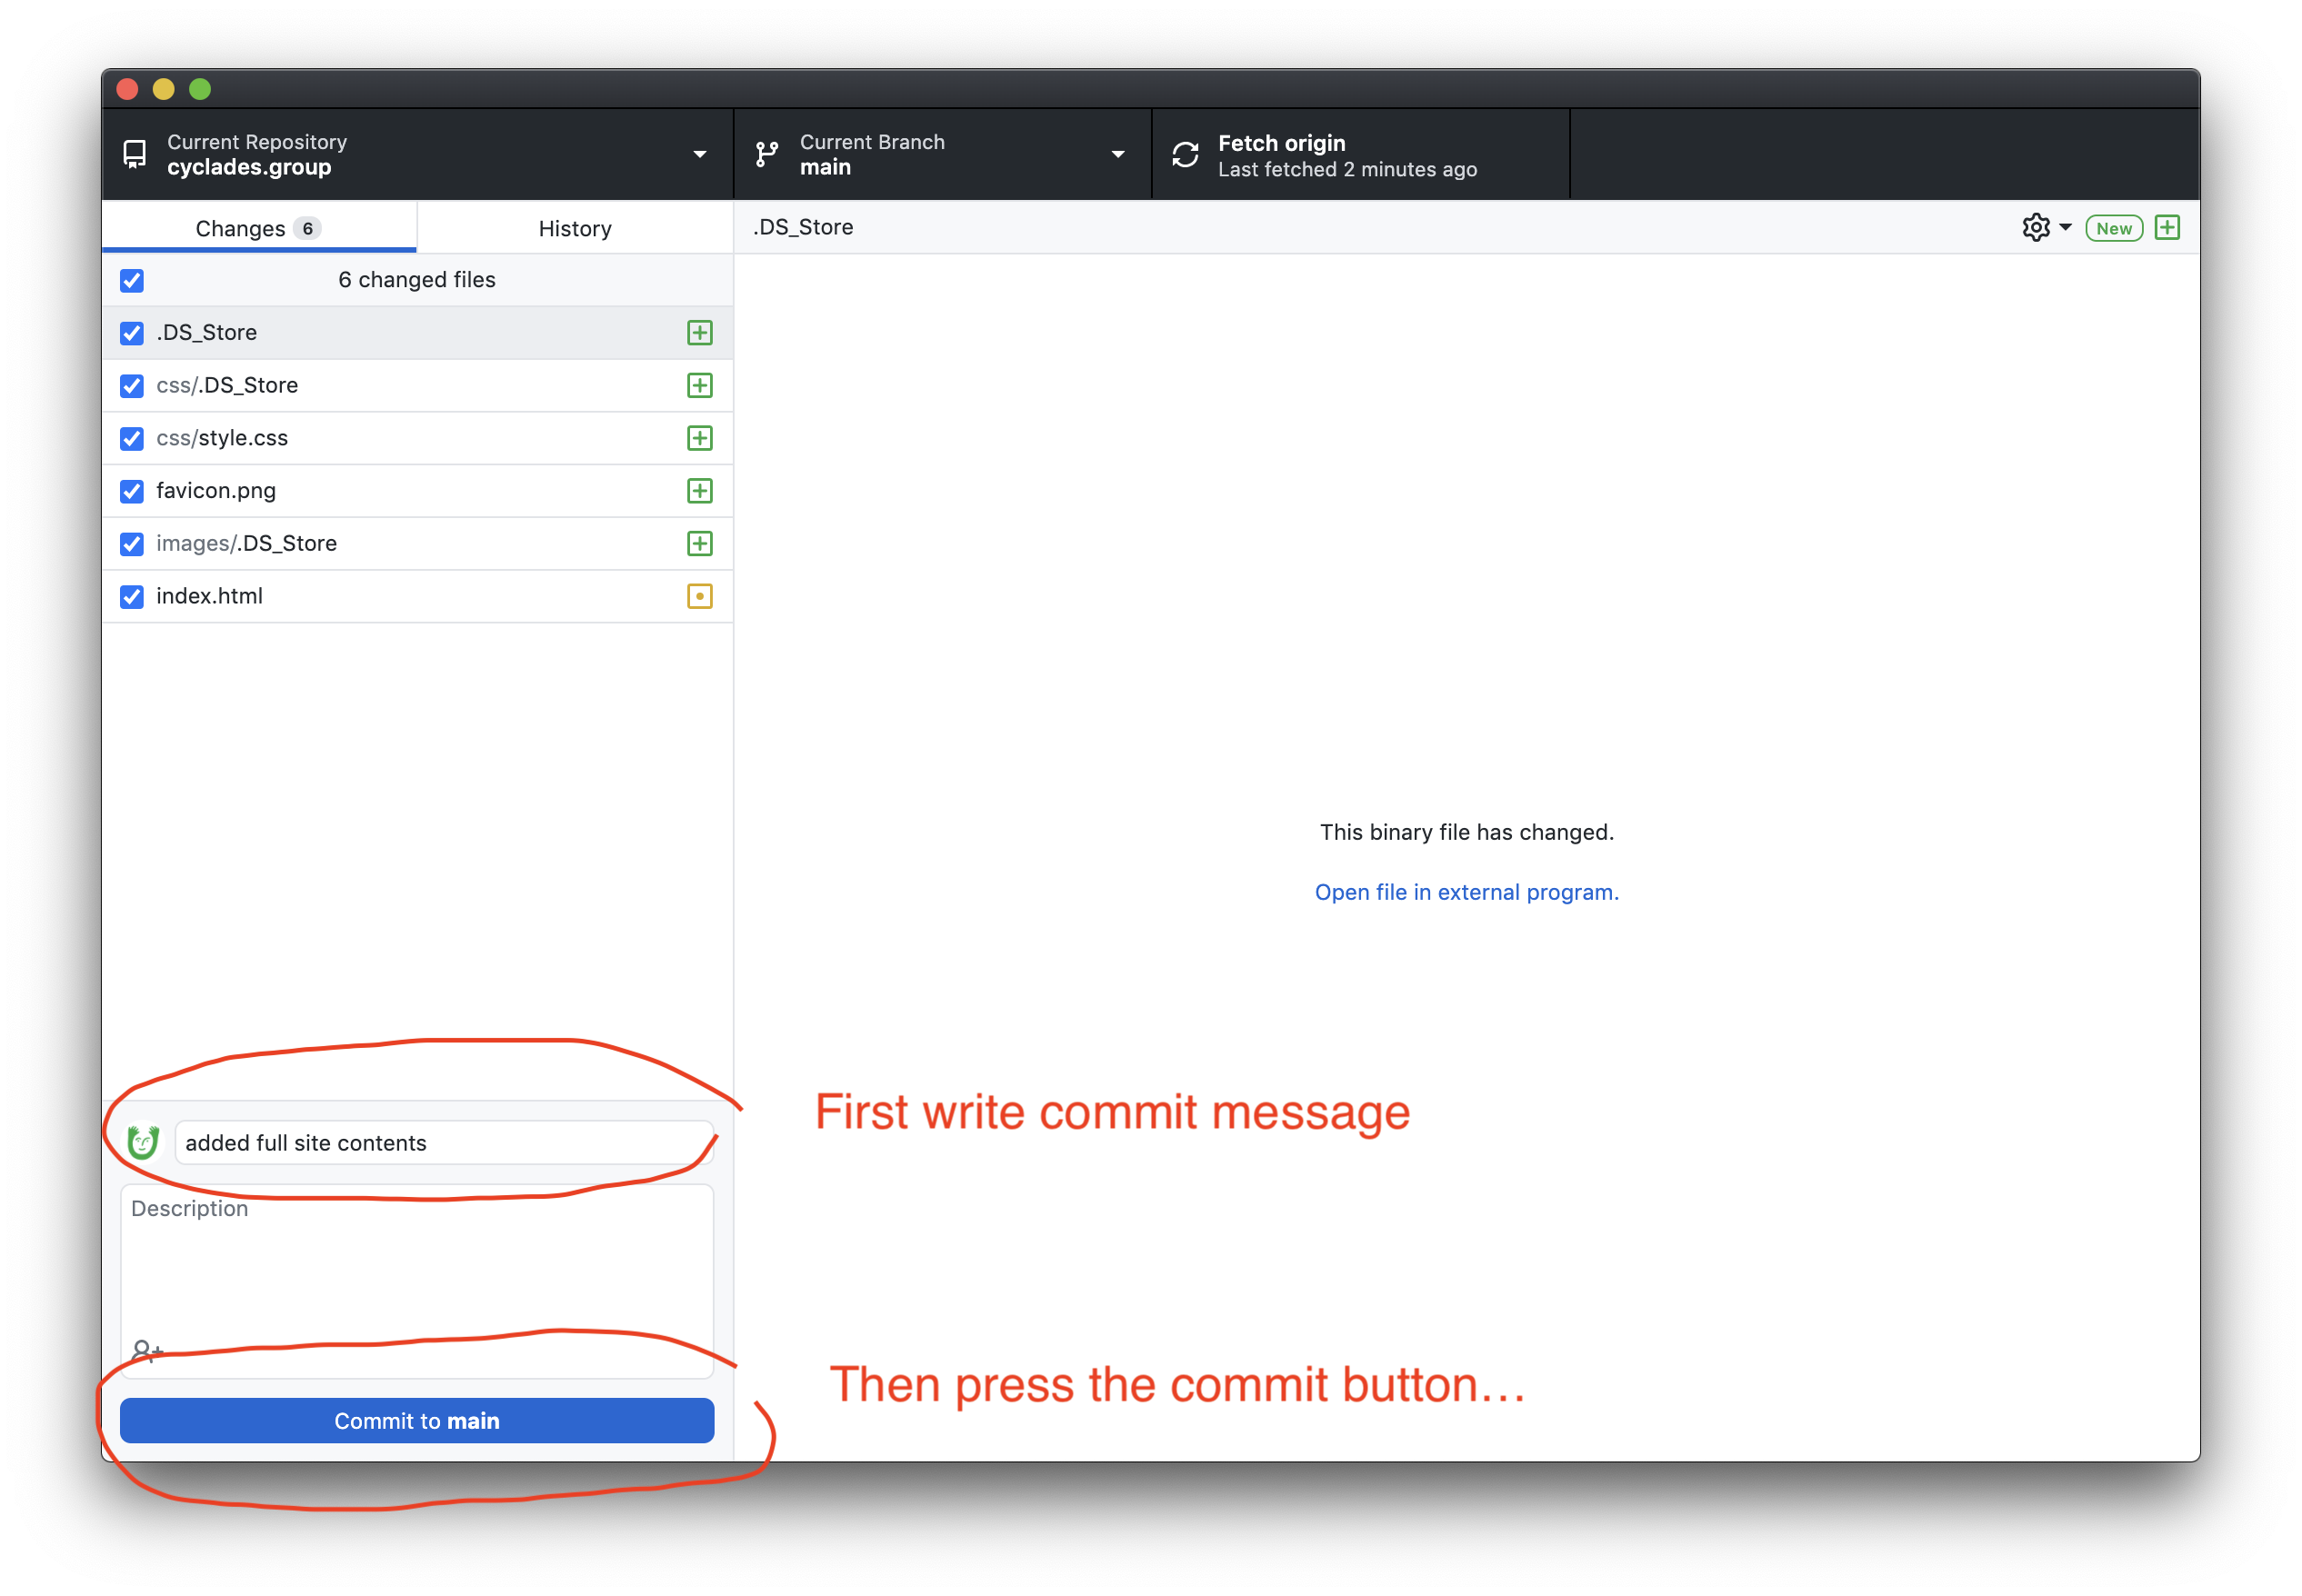
Next, add a commit message and press "commit to main"...
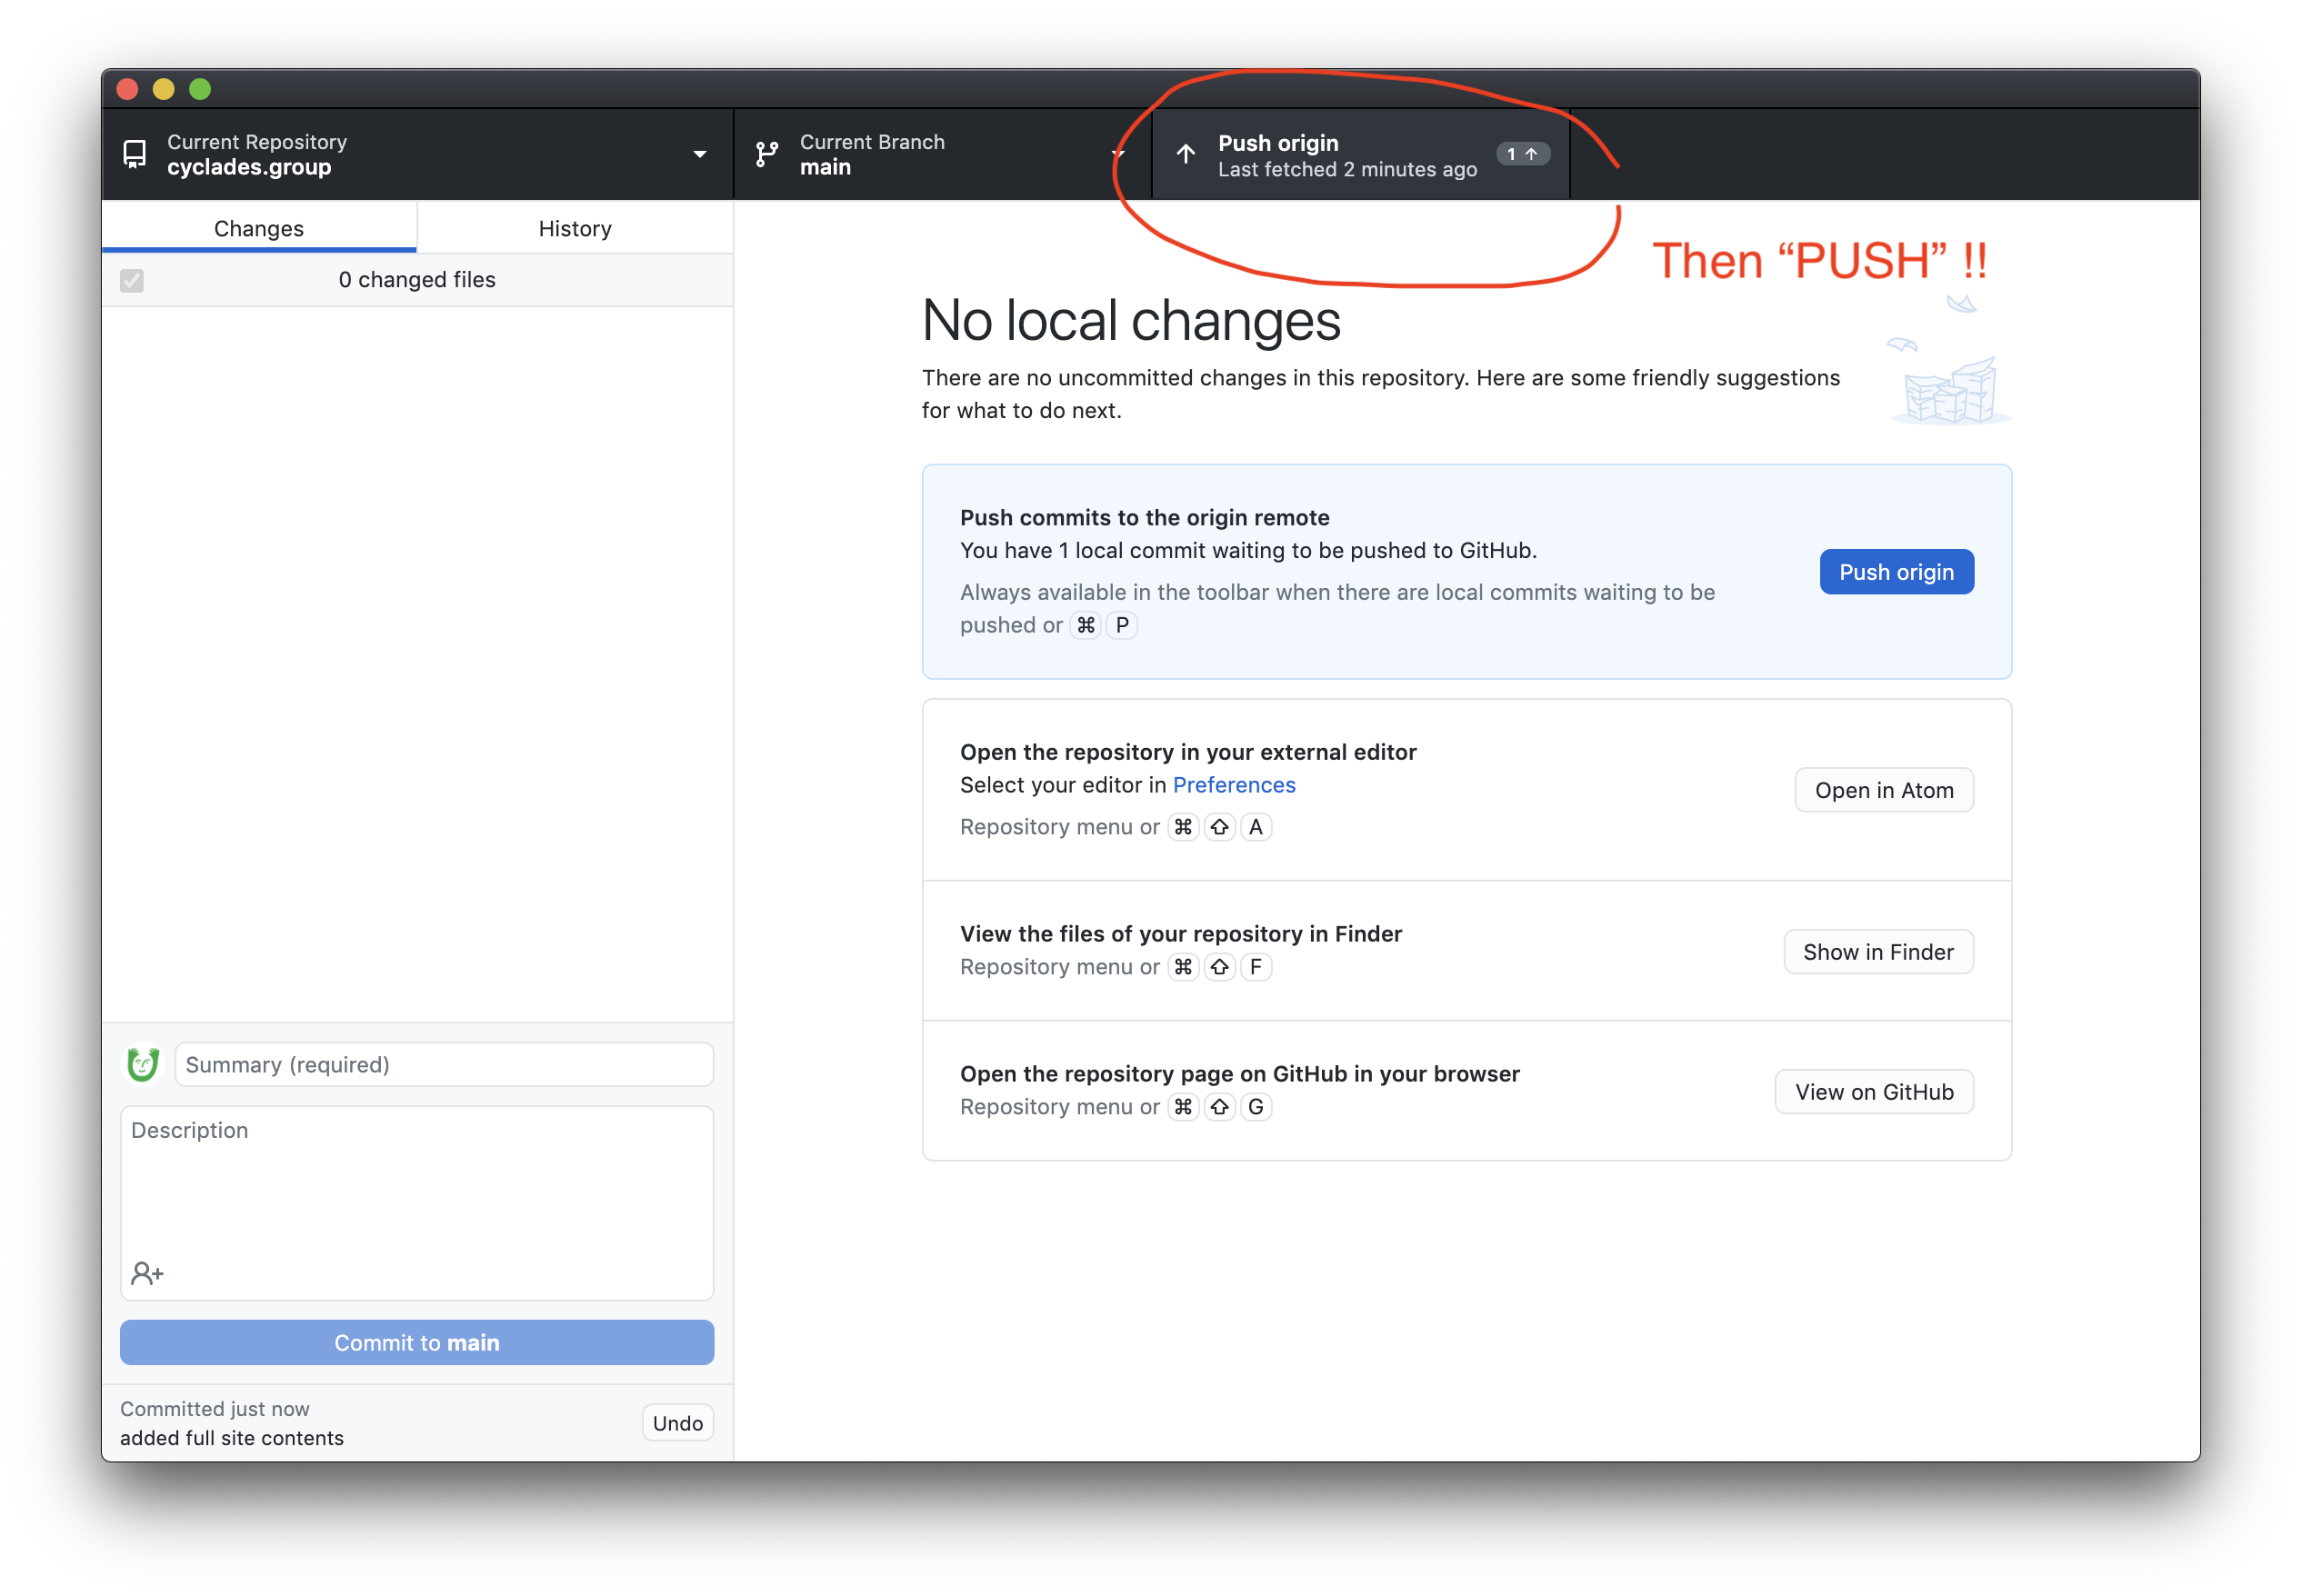
And then push your repository...
There might be a bit of a lag, but your website should update a couple minutes after pushing. To confirm that the changes made it to GitHub, often I like to go back to my repository's page on www.github.com...
